
<< Go Back to Part 1 (Implementing Bootstrap)
This is the continuation of the article Knockout.js and Bootstrap with ASP.NET MVC: Step by Step (Part 1).
In Part 1, you have created the ASP.NET MVC web application and implemented bootstrap user interface. Now the web solution is ready to implement MVVM architecture using Knockout.JS.
NOTE: If you already haven’t read part 1, please go to Part 1. This part of the article is the continuation of Knockout.js and Bootstrap with ASP.NET MVC: Step by Step (Part 1). You will continue with the mvc-bootstrap project created in part 1 and implement Knockout.JS.
Bundling Knockout.JS:
- In the solution explorer, go to App_start folder and open BundleConfig.cs.
- In BundleConfig.cs add the below code to bundle the Knockout js file.
bundles.Add(new ScriptBundle("~/bundles/knockout").Include( &quot;~/Scripts/knockout-2.2.0.js&quot;)); - Open the _Layout.cshtml file and add the below code under the bootstrap render script
@Scripts.Render(&quot;~/bundles/knockout&quot;)
Add knockout declarative binding to the views:
- In solution explorer, expand Views folder and then expand MTB_Articles folder. Open Create.cshtml.
- Replace the existing code with the below code. If you see the input tags, they are bound by data-bind. These are the declarative bindings which binds the view with view model. You can also notice the html tags are having bootstrap class.
<div class="span12"> <fieldset> <legend>Create Articles</legend> <div class="control-group"> <label class="control-label">Title: </label> <div class="controls"> <input type="text" data-bind="value: Title" placeholder="Article Title" class="input-medium"></pre> <div class="control-group"> <label class="control-label">Excerpts: </label> <div class="controls"> <textarea data-bind="value: Excerpts" placeholder="Article Excerpts" rows="3"></div> </div> <div class="control-group"><label class="control-label">Content: </label> <div class="controls"></div> </div> <div class="control-group"><input class="btn btn-primary" type="button" value="Save" data-bind="click: btnCreateArticle" /> <a class="btn btn-primary" href="@Url.Action(">Cancel</a></div> <pre> - Open the index.cshtml file and replace the code with the below.
@{ ViewBag.Title = "Articles | My Tec Bits"; }</pre> <h2>Articles</h2> <a class="btn btn-primary btn-large" href="@Url.Action(">Create New »</a> <pre> <tbody data-bind="foreach: Articles"></pre> <table class="table"> <thead> <tr> <th>Title</th> <th>Excerpts</th> <th>Content</th> </tr> </thead> <tbody> <tr> <td data-bind="text: Title"></td> <td data-bind="text: Excerpts"></td> <td data-bind="text: Content"></td> </tr> </tbody> </table> <pre> @section Scripts { @Scripts.Render("~/Scripts/ViewModel/IndexVM.js") } - The views are ready with KnockoutJS declarative binding. Now, start creating the View Model (VM) with KnockoutJS.
Creating Knockout.JS View Model (VM):
- In Solution Explorer, right-click Scripts folder, select Add, and then New Folder. Name the folder as ViewModel.
- Right click ViewModel folder, select Add, and then select JavaScript file.
- Enter file name as CreateVM.
- In the CreateVM.js file, add the below code. If you notice this knockout view model code, first, the declarative bindings done on the view is made observable. Then the button click will call the ajax post to the create method on the controller.
var urlPath = window.location.pathname; var CreateArticleVM = { Title: ko.observable(), Excerpts: ko.observable(), Content: ko.observable(), btnCreateArticle: function () { $.ajax({ url: urlPath + '/Create', type: 'post', dataType: 'json', data: ko.toJSON(this), contentType: 'application/json', success: function (result) { window.location.href = urlPath + '/'; }, error: function (err) { if (err.responseText == "success") { window.location.href = urlPath + '/'; } else { alert(err.responseText); } }, complete: function () { } }); } }; ko.applyBindings(CreateArticleVM); - Open the Create.cshtml file and add the below code to the bottom after all the html code. This will render the just created knockout view model file to Create.cshtml view.
@section Scripts { @Scripts.Render("~/Scripts/ViewModel/CreateVM.js") } - Now, you need to do some cleanup work in the controller. Open the controller MTB_ArticlesController.cs and got to the public ActionResult Create with HttpPost attribute. Replace the method with the below code.<<image 15>>
[HttpPost] public String Create(MTB_Article mtb_article) { db.MyTecBitsDB.Add(mtb_article); db.SaveChanges(); return &quot;success&quot;; } - In the ViewModel folder create another view model file called IndexVM.js.
- Add the below code to IndexVM.js.
var urlPath = window.location.pathname; $(function () { ko.applyBindings(indexVM); indexVM.loadArticles(); }); var indexVM = { Articles: ko.observableArray([]), loadArticles: function () { var self = this; //Ajax Call Get All Articles $.ajax({ type: "GET", url: urlPath + '/FillIndex', contentType: "application/json; charset=utf-8", dataType: "json", success: function (data) { self.Articles(data); //Put the response in ObservableArray }, error: function (err) { alert(err.status + " : " + err.statusText); } }); } }; function Articles(Articles) { this.Title = ko.observable(Articles.Title); this.Excerpts = ko.observable(Articles.Excerpts); this.Content = ko.observable(Articles.Content); } - In the controller MTB_ArticlesController.cs add the below method to return JSON data.
public JsonResult FillIndex() { return Json(db.MyTecBitsDB.ToList(), JsonRequestBehavior.AllowGet); } - Open the Index.cshtml file and add the below code to the bottom after all the html code. This will render the just created knockout view model file to Index view.
@section Scripts {
   @Scripts.Render("~/Scripts/ViewModel/IndexVM.js")
}
Result of this article:
Below are couple of resultant web pages created by this article.
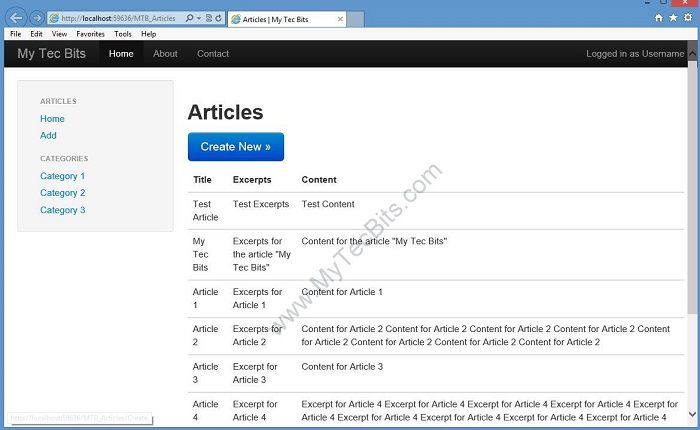
Index Page:
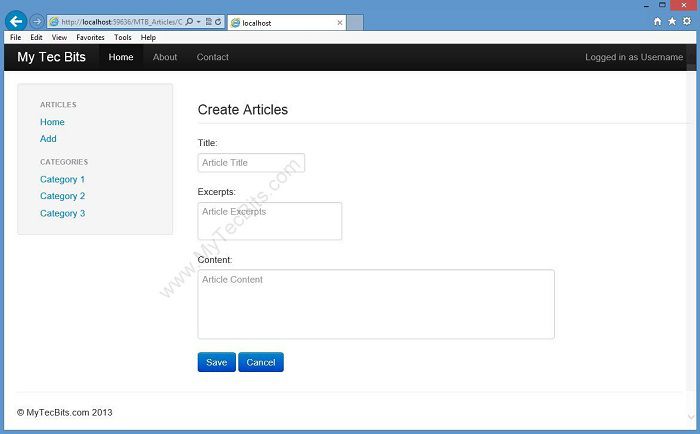
Create Page:
Download Complete Source Code:
You can download the complete source code created using this article from GitHub (https://github.com/mytecbits/Knockout-Bootstrap-MVC-Sample).
If you are new to GitHub, then follow the below steps to download and build the sample solution.
- Go to https://github.com/mytecbits/Knockout-Bootstrap-MVC-Sample.
- Download the solution by clicking the Download ZIP button near the lower right corner.
- Extract the solution files from the downloaded zip file.
- Open the solution in Visual Studio Express 2012 for Web.
- Rebuild the solution. This will restore all the NuGet packages needed for the solution.
- Hit F5 Build and launch the solution.
<< Go Back to Part 1 (Implementing Bootstrap)
Twitter Bootstrap with ASP.NET: List of Articles.
function Articles(Articles) {
this.Title = ko.observable(Articles.Title);
this.Excerpts = ko.observable(Articles.Excerpts);
this.Content = ko.observable(Articles.Content);
}
what above function does?
Great article man!! Can you please post more feed on KnockOut with MVC like validations, templating, SPA
Hi Amit,
Thank you. Will try to post more on ko and mvc soon.
Would be nice if you put back the edit, delete and detail implementation using knockout.
Worked when tsing knockout.2.3.0.js.
Great article. Thank you
The index part dies not work. The existing records were not load when you first open the application. Have not been able to fix it.