
There are several web frameworks available for creating website with Python. The popular once are Django, Flask, Prymid, TurboGears, Web2py, etc… Here, in this article we will go over the step by step instruction on how to use Python for website development using Django as the web framework, Visual Studio Code as the editor on macOS.
Tools & technologies used
- Python 3.7.4.
- Django 2.2.6.
- Visual Studio Code 1.39.2.
- macOS Catalina 10.15.
Prerequisites
Creating a Python virtual environment
To start with, you will see how to create a python project with virtual environment for the web application. Django package will be installed in this virtual environment in the next section.
- Launch VS Code.
- Open a folder for Python django workspace by going to Files >> Open … >> Select or create a folder in the finder window and open it. For this illustration, name the folder as py_django_web. This will be your Python workspace.
- In VS Code Editor, open the Command Palette, by pressing Shift, Command and P keys.
- Search and start Terminal: Create New Integrated Terminal. The terminal panel will open at the bottom.
- In the terminal run the commands.
python3 -m venv envsource env/bin/activate
- A new virtual environment called env is now created for the workspace. To see this, go to the explorer panel and expand the newly created folder under the workspace.
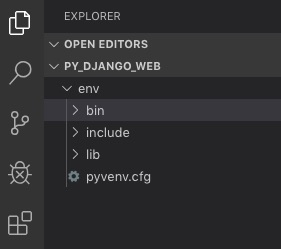
- Open the Command Palette again and search and select Python: Select Interpreter. Now you will see the newly created virtual environment (something similar to Python 3.7.4 64-bit (‘env’, venv)). Select the virtual environment as your interpreter.
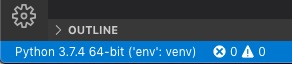
- Virtual environment is ready.
Creating django project
As the virtual environment is ready, it is time to install the django package in the virtual environment and set a startup web project.
- Again start Terminal: Create New Integrated Terminal. from the command palette.
- In the integrated terminal run the command:
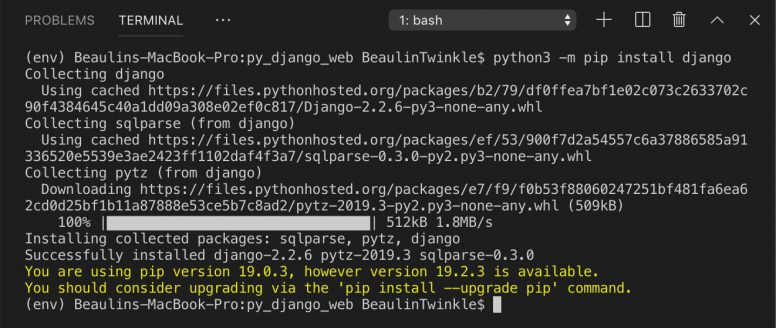
python3 -m pip install django
- Django and its dependent packages will be downloaded and installed. This installation may take several minutes to complete. (I had to wait for nearly 20 minutes for this installation to complete on my laptop.)
- Virtual environment is ready for Django web development and coding. Now, you have to create a startup web project.
- Go back to the virtual environment’s Integrated Terminal and run the below command. (NOTE: Don’t forget to include the dot . at the end of the command which directs the command to the current directory. dj_web is the name of the sub folder the command supposed to create.)
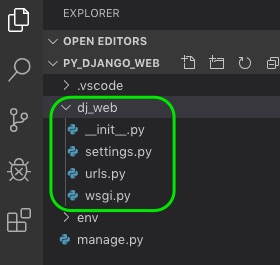
django-admin startproject dj_web .
- Django web project is now created. You can see the sub folder named dj_web and few files underneath.
- To check the web project, you have to start the web server. To start the web server run the command:
python3 manage.py runserver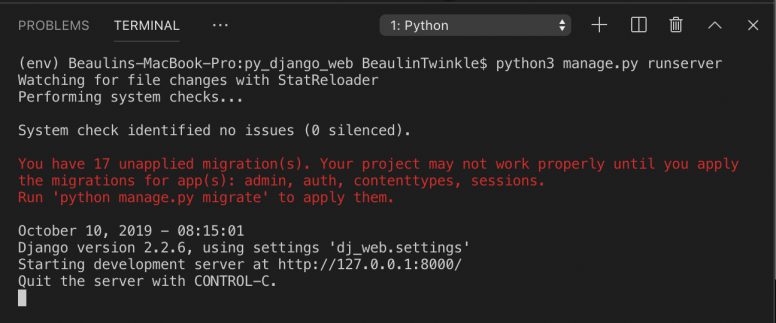
- The Django web server is now started in the post 8000. (NOTE: If you notice the above image, while starting the server there is a message in red letters saying about unapplied migrations. To apply the migrations and remove this message read my article Django: You have .. unapplied migration(s). You can do this later after properly closing the web server.)
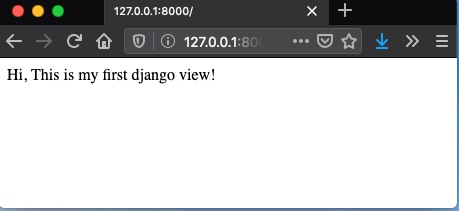
- To launch the default home page from your django project just cmd+click the url (http://127.0.0.1:8000/) displayed the result in the terminal or copy it and enter it to your browser. The default home page looks like this:
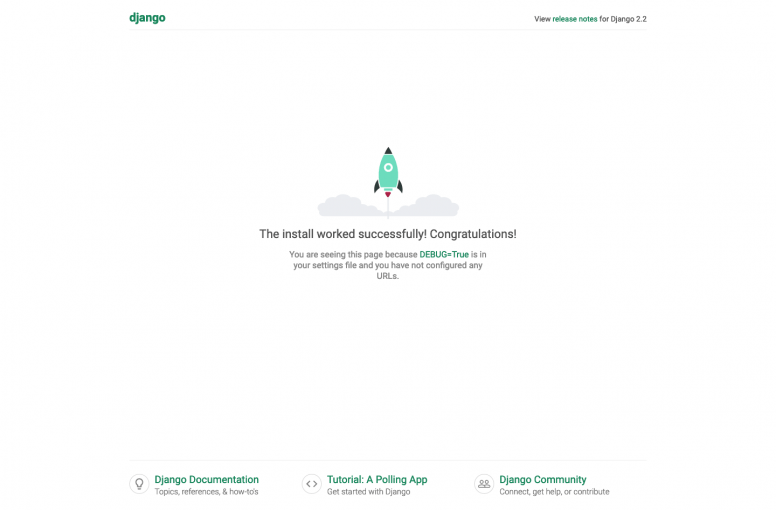
- If you can see this default page the it is confirmed that django web project is installed properly.
- Once done, close the web server. To close the web server go to the terminal and press CONTROL-C.
Creating a web app
Now you have to create a django web app. Follow these steps to create a web app.
- In the Visual Studio Code Terminal run this command. In this command dj_app is the name of the web app:
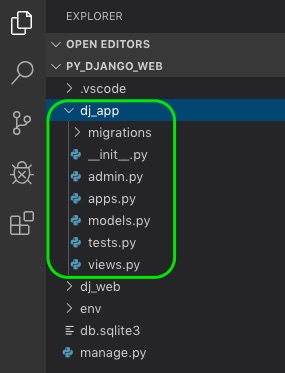
python3 manage.py startapp dj_app
- The above startup command creates a folder called dj_app. This the the folder which contains all the code files for the django web app.
- Now open the file dj_app/views.py and replace the existing the code with the below code. In this def home(request) and the following line is how you define a view and what to render in the browser. This definition is for home page.
from django.http import HttpResponse

def home(request):
    return HttpResponse("Hi, This is my first django view!")
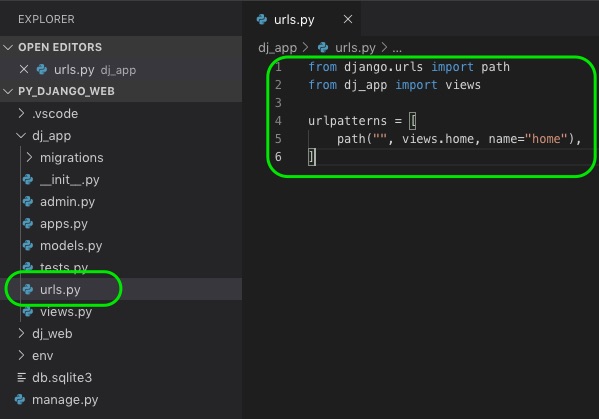
- Create a new file named urls.py under the folder dj_app. This file is used for specifying the url route patterns of the views under the app folder dj_app. Add the below content to dj_app/urls.py.
from django.urls import path
from dj_app import views

urlpatterns = [
    path("", views.home, name="home"),
]
- Now, you have to import this file dj_app/urls.py to the master urls file under dj_web folder. Only then the url route settings we have done in dj_app will be handled by the web project.
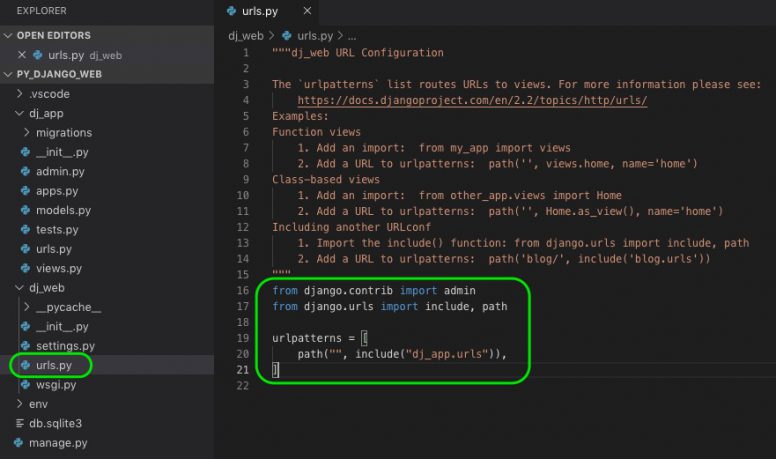
- To import, open the file dj_web/urls.py and replace the code with the below code:
from django.contrib import admin
from django.urls import include, path

urlpatterns = [
    path("", include("dj_app.urls")),
]
- The web app and the basic view (home) is now ready. Now, start the web server by running the command python3 manage.py runserver and launch the web app using the the url http://127.0.0.1:8000/ in any browser.
- Don’t forget to close the web server once done.
Creating launch profile
As you have seen already, every time when you start the python django web server you have to type in a command in the terminal. This will become difficult during the development process. You can overcome this problem by creating a launch profile. Launch profile is part of the the debugger settings in VS Code. As debugging is out of scope of this article In this section, I will go through launch profile setting alone. I will write another article with in depth details on debugging.
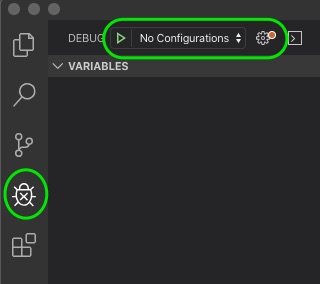
- Go to VS Code’s debug view by pressing the debug icon at the left activity panel.
- Press the settings icon (gear icon) with a warning dot at the top, next to the No Configuration.
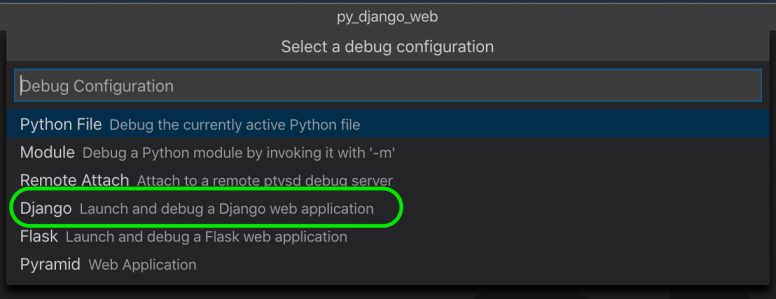
- Pressing the settings icon, a prompt box opens at the top with the list of debugger options. From the list select Django: Launch and debug a Django web application.
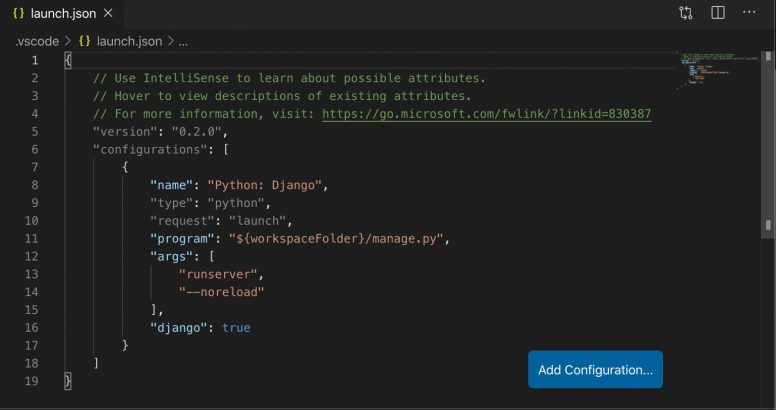
- A new file called launch.json will be created under the .vscode folder and opens in the editor window. This file will have the debug configurations. Make sure the content of the file is similar to the screenshot below. Here the values in the program and the args section performs similar to the terminal command python3 manage.py runserver –noreload.
- Save the file.
- Now, check the debug configuration drop down list at the top left. Python: Django will be selected by default. If not choose it manually.
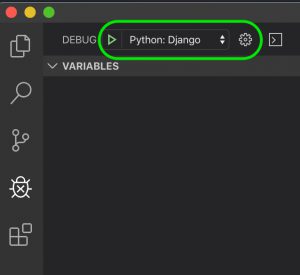
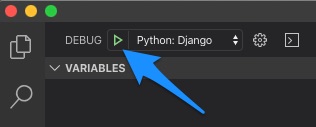
- The launch profile setting is now complete. You can now start the web server and the debugger just by pressing the green arrow found in between DEBUG and Python: Django. Other ways to start the web server in debug mode is by pressing F5 key or by going to the menu >> Debug >> Start Debugging.
- The web server is now started in debug mode. You can identify the changes happened in the Visual Studio Code editor. A debugging toolbar appears at the top and the color of the status bar changes to orange.
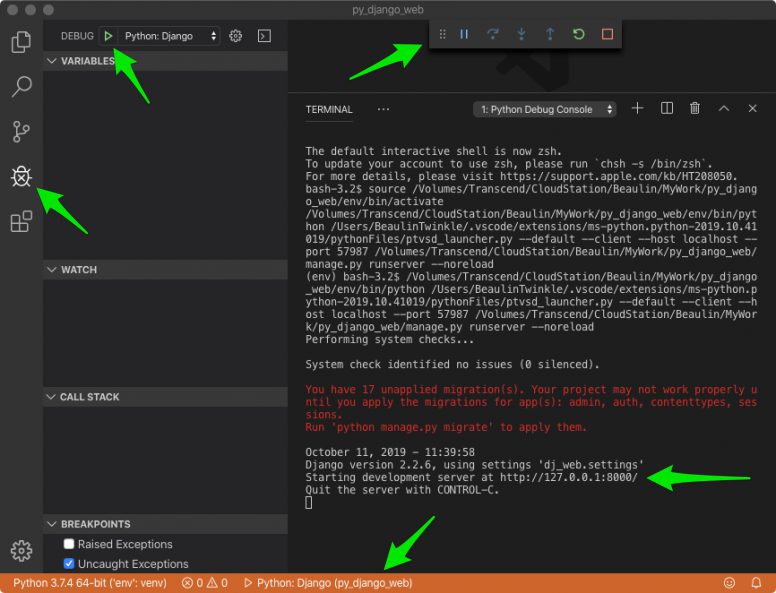
- To open the web app in the browser either command+click the url http://127.0.0.1:8000/ or copy and paste it to the browser.
- NOTE: If you want to start the web server without debug mode, then press the Control + F5 keys.
- Once done, don’t forget to close the web server by pressing CONTROL-C.
Using templates
The web app view (home) you have created earlier has only plain text. It is possible to add HTML in the Python code within the view definition function in views.py. But, I would strongly advise not to mix HTML code with python code. Avoiding HTML in python code will improve the security of your application from cross site scripting attack. It will also increase the code readability. In Django, you can use templates to segregate HTML code from python code.
In this section, you will see how to create a template for HTML and add placeholders to capture and render the data sent from the python code during run-time.
- Open the file dj_web/settings.py.
- Find the list called INSTALLED_APPS and add dj_app to it:
'dj_app',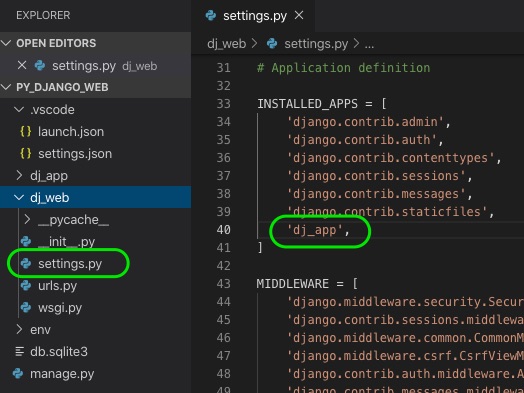
- In the dj_app folder create a sub-folder called templates.
- Now, create another sub-folder called dj_app under templates folder. The name of the folder should be the same as the name of the web app.
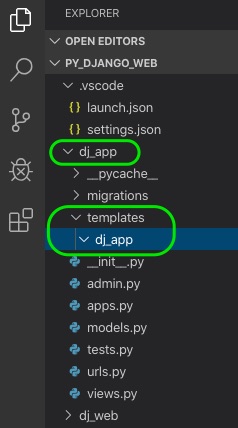
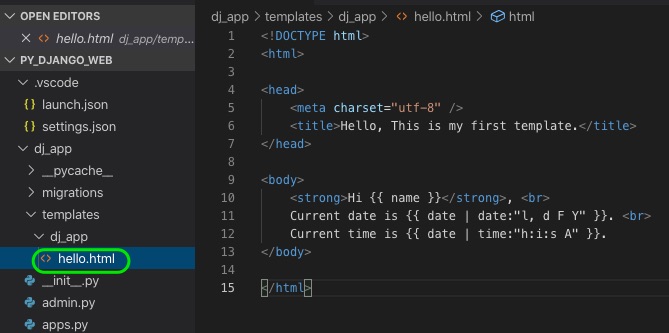
- Under the /dj_app/templates/dj_app folder create a file called hello.html.
- Add the below content to the hello.html file. In this, the place holders are marked by double opening and double closing curly braces {{ and }}. Here there a three placeholders, one for name variable and two for date variable with filter |.
<!DOCTYPE html>
<html>

<head>
    <meta charset="utf-8" />
    <title>Hello, This is my first template.</title>
</head>

<body>
    <strong>Hi {{ name }}</strong>, <br>
    Current date is {{ date | date:"l, d F Y" }}. <br>
    Current time is {{ date | time:"h:i:s A" }}.
</body>

</html>
- Open the views.py file add these import statements along with the existing one.
from datetime import datetime
from django.shortcuts import render
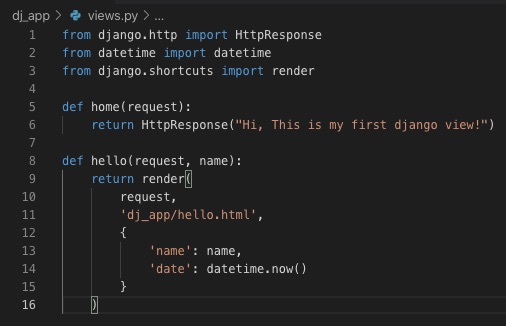
- In the same file (views.py), add this function to load the template we have just created.
def hello(request, name):
    return render(
        request,
        'dj_app/hello.html',
        {
            'name': name,
            'date': datetime.now()
        }
    )
- After the changes, the content of the views.py file looks like this:
- Now go to dj_app/urls.py file and add a route entry under urlpatterns list for our new view.
path("hello/<name>", views.hello, name="hello"),
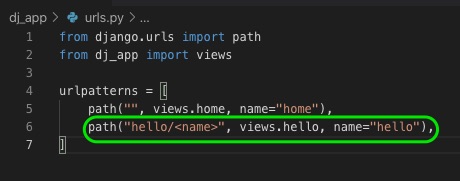
- The hello view with the HTML template is now created and the URL route is set.
- Start the web server without debug mode by pressing the Control + F5 keys.
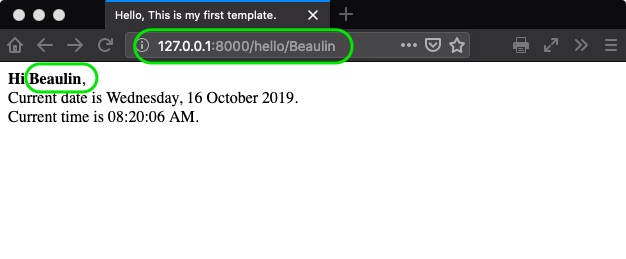
- In the browser, launch the web app and navigate to /hello/name url. Let name be some name.
Creating & using static files in web app
Now you will see how to add and serve static files like .css or .js files to your Django web app.
Setup the web app to use static files
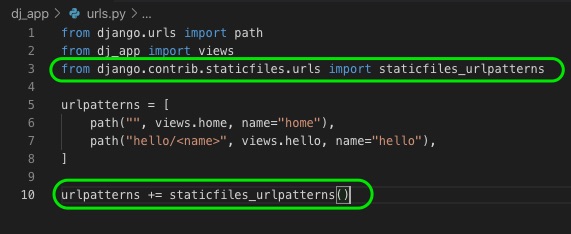
- Open dj_web/urls.py file and add this import statement.
from django.contrib.staticfiles.urls import staticfiles_urlpatterns
- Add this line to the end of the same file.
urlpatterns += staticfiles_urlpatterns()
Create a static file
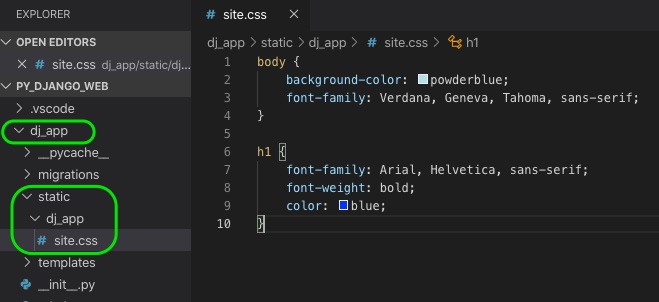
- Under the dj_app folder create a sub-folder called static.
- Again create a sub-folder called dj_app under static. The sub-folder name should be the same as the name of the web app.
- in the /dj_app/static/dj_app folder add style sheet file called site.css and add this content.
body {
    background-color: powderblue;
    font-family: Verdana, Geneva, Tahoma, sans-serif;
}

h1 {
    font-family: Arial, Helvetica, sans-serif;
    font-weight: bold;
    color: blue;
}
Refer static file in template
- Open the template file you have created before (templates/dj_app/hello.html)
- Add this code just below the title tag at the head section. The tag {% load static %} allows the template to use {% static %} tag for referring a static file.
{% load static %}
<link rel="stylesheet" type="text/css" href="{% static 'dj_app/site.css' %}" />
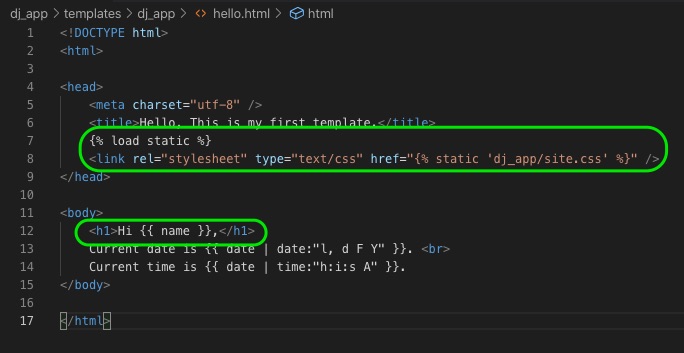
- Add or modify the content in the tag and add a H1 tag. this is to test and make sure the static file style.css is served by the Django web server. Here is my template file after changes:
<!DOCTYPE html>
<html>

<head>
    <meta charset="utf-8" />
    <title>Hello, This is my first template.</title>
    {% load static %}
    <link rel="stylesheet" type="text/css" href="{% static 'dj_app/site.css' %}" />
</head>

<body>
    <h1>Hi {{ name }},</h1>
    Current date is {{ date | date:"l, d F Y" }}. <br>
    Current time is {{ date | time:"h:i:s A" }}.
</body>

</html>
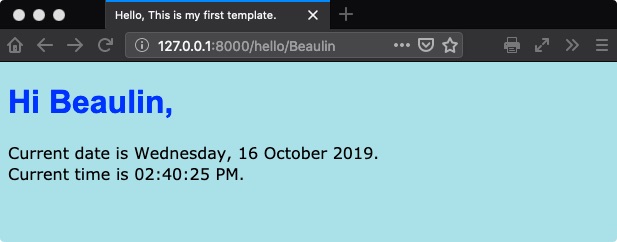
- Now, run the web app in non-debug mode and browse the url hello/name again and see if the styles are rendering properly. Here is the result.
Adding images and other media files is same as adding other static files. Sometime you may need to segregate images in a separate folder. If you still need the steps to add images to web app, then follow the article Adding image to Python Django web app.
Now you know how to add and serve a static file like style sheet, java script, fonts, images, etc…
Creating and using a base template
In most of the web applications there will be multiple pages. Some of the content in all the pages will be common for all the pages. For example the navigation menu will be common to all the pages. So, it is always a good practice to have these type of common content in a single file. It is also easy to maintain.
In Django web app, the base template file will have the common content pertinent to several templates and views. Let us see how and where to crate a base template and refer it to other templates or views.
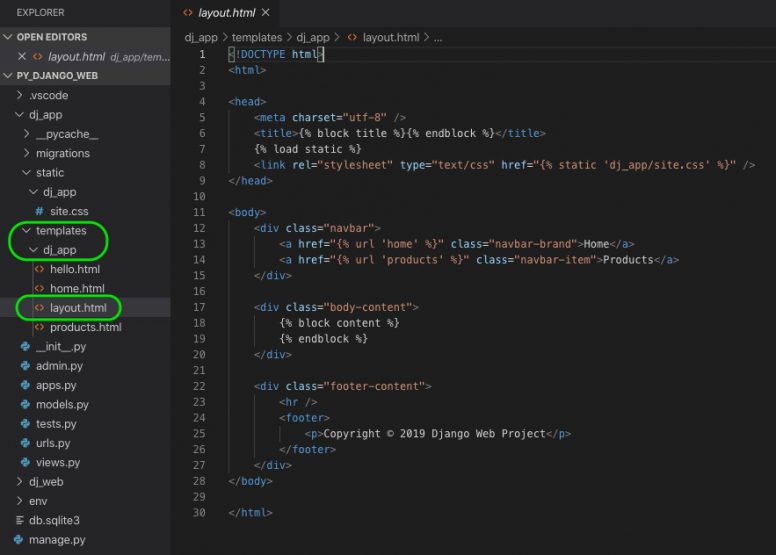
- Create a file called layout.html in the folder templates/dj_app. This will be your base template.
- Add these content to the layout.html file. Here, the tag {% load static %} and the following link tag are used to load the static content. The {% url %} tag is used to generate the url of other pages or views in run time. The section starting from {% block content %} and ending with {% endblock %} tag is used by the other templates to override and fill with the content.
<!DOCTYPE html>
<html>

<head>
    <meta charset="utf-8" />
    <title>{% block title %}{% endblock %}</title>
    {% load static %}
    <link rel="stylesheet" type="text/css" href="{% static 'dj_app/site.css' %}" />
</head>

<body>
    <div class="navbar">
        <a href="{% url 'home' %}" class="navbar-brand">Home</a>
        <a href="{% url 'products' %}" class="navbar-item">Products</a>
    </div>

    <div class="body-content">
        {% block content %}
        {% endblock %}
    </div>

    <div class="footer-content">
        <hr />
        <footer>
            <p>Copyright © 2019 Django Web Project</p>
        </footer>
    </div>
</body>

</html>
- Now, open the style sheet file site.css in the folder static/dj_app and replace the existing content with this:
body {
    font-family: Verdana, Geneva, Tahoma, sans-serif;
}

h1 {
    font-family: Arial, Helvetica, sans-serif;
    color: darkgray;
}

.navbar {
    background-color: lightgray;
    font-size: 11px;
    font-family: Arial, Helvetica, sans-serif;
    color: black;
    padding: 8px 5px 8px 5px;
}

.navbar a {
    text-decoration: none;
    color: inherit;
}

.navbar-brand {
    font-size: 1.2em;
    font-weight: 600;
}

.navbar-item {
    font-variant: small-caps;
    margin-left: 30px;
}

.body-content {
    padding: 5px;
}

.footer-content{
    font-size: small;
    font-style: italic;
}
- Go to the folder templates/dj_app and add a template file for home view. Let’s call it home.html and add the content below. The first line refers the base-template layout.html to this template. Within the title block and content block you can add some title and content of the page.
{% extends "dj_app/layout.html" %}
{% block title %}

{% endblock %}
{% block content %}

{% endblock %}
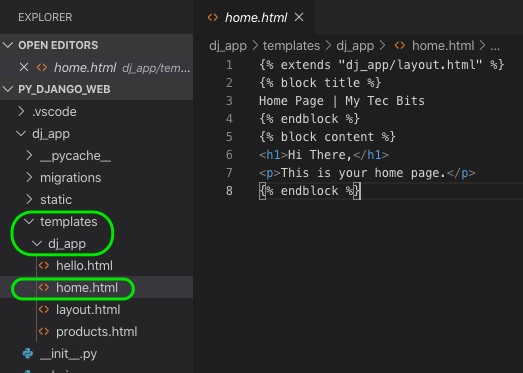
After adding title and content, the home.html looks like this:
{% extends "dj_app/layout.html" %}
{% block title %}
Home Page | My Tec Bits
{% endblock %}
{% block content %}
<h1>Hi There,</h1>
<p>This is your home page.</p>
{% endblock %}
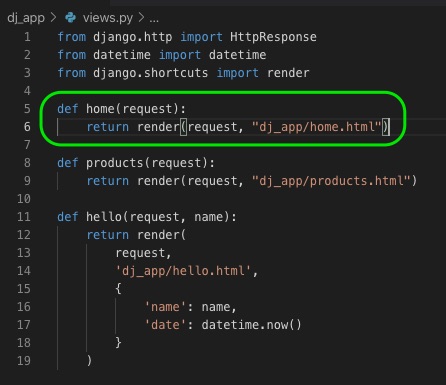
- Open views.py and replace the home view function with the below code:
def home(request):
    return render(request, "dj_app/home.html")
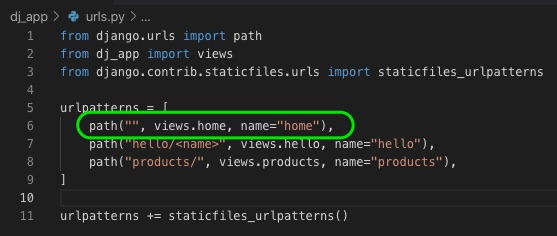
- In the web app’s (dj_app) urls.py file make sure the url route for the home page is available. If not, add it:
path("", views.home, name="home"),
- Home page is now ready. Now, you have to create another template for the the products page.
- Go to the folder templates/dj_app again and add a template file for products page. Let’s call it products.html and add the content given below below. (NOTE: While creating several html templates, It will be a good practice to create a code snippet and use it instead of copy paste the template code in several files. Read the article Creating code snippet for Python Django web app in VS Code.)
{% extends "dj_app/layout.html" %}
{% block title %}
Products Page | My Tec Bits
{% endblock %}
{% block content %}
<h1>Products</h1>
<p>This page will have the list of all products.</p>
{% endblock %}

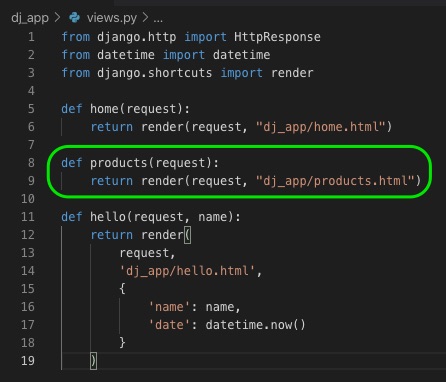
- Open views.py and add the properties view function with the below code:
def products(request):
    return render(request, "dj_app/products.html")
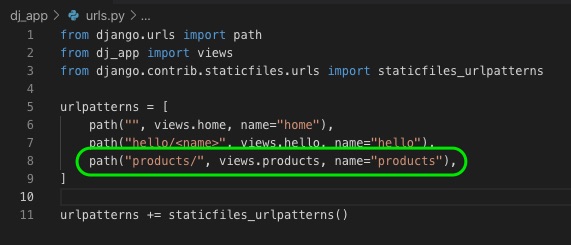
- In the web app’s urls.py file add the url route for the properties page.
path("products/", views.products, name="products"),
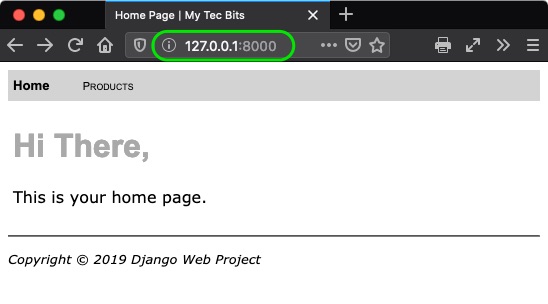
- Now, run the project and open the home page in browser. Here is a simple website with Python Django using base template and multiple page templates.
With this, I’m completing this article, In the coming days, I will write about using database, debugging and creating code snippets.
Next Steps
- Most of the web application nowadays require database. To continue this tutorial and add database to this illustration read the article using database in Python Django website.
- While creating several html templates in Python Django web application in Visual Studio Code, It will be a good practice to create a code snippet instead of copy paste the template code in several files. Read this article about creating code snippets and using it.
- Debugging a Python Django web application in Visual Studio Code editor.
Reference
- I have referred visual studio tutorial and created this article in macOS perspective and in a simplified manner.