
Adding bootstrap In ASP.NET GridView control needs an extra setting to make the GridView to look great. Here we’ll see the extra setting required for the GridView control to use the bootstrap properly. This illustration works with Bootstrap 3. (NOTE: An updated version of this article using Bootstrap 4 is available here.)
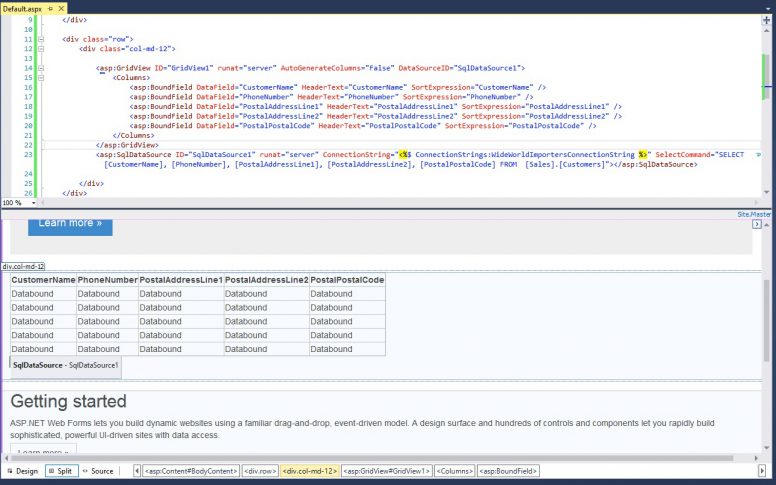
Consider, you have a simple GridView attached to an SQLDataSource in an aspx file. Here I have a simple GridView control:
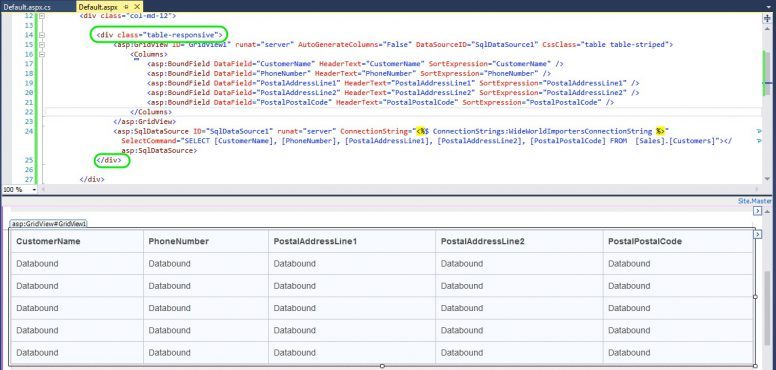
<asp:GridView ID=”GridView1″ runat=”server” AutoGenerateColumns=”False” DataSourceID=”SqlDataSource1″>
<Columns>
<asp:BoundField DataField=”CustomerName” HeaderText=”CustomerName” SortExpression=”CustomerName” />
<asp:BoundField DataField=”PhoneNumber” HeaderText=”PhoneNumber” SortExpression=”PhoneNumber” />
<asp:BoundField DataField=”PostalAddressLine1″ HeaderText=”PostalAddressLine1″ SortExpression=”PostalAddressLine1″ />
<asp:BoundField DataField=”PostalAddressLine2″ HeaderText=”PostalAddressLine2″ SortExpression=”PostalAddressLine2″ />
<asp:BoundField DataField=”PostalPostalCode” HeaderText=”PostalPostalCode” SortExpression=”PostalPostalCode” />
</Columns>
</asp:GridView>
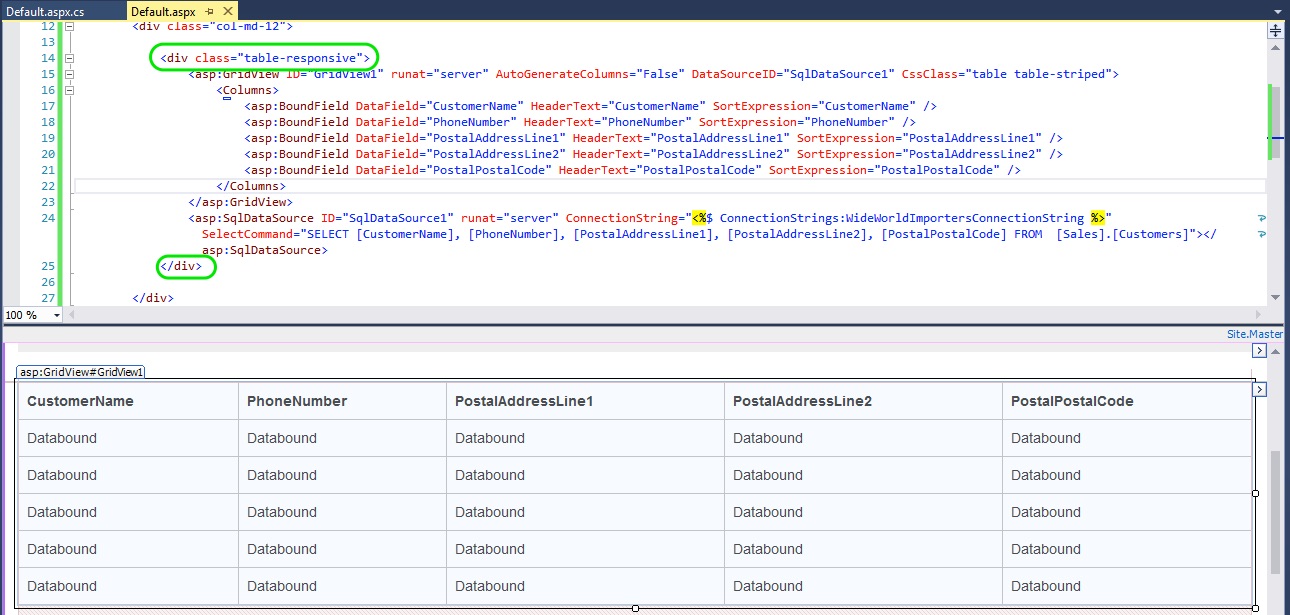
<asp:SqlDataSource ID=”SqlDataSource1″ runat=”server” ConnectionString=”<%$ ConnectionStrings:WideWorldImportersConnectionString %>” SelectCommand=”SELECT [CustomerName], [PhoneNumber], [PostalAddressLine1], [PostalAddressLine2], [PostalPostalCode] FROM [Sales].[Customers]”>
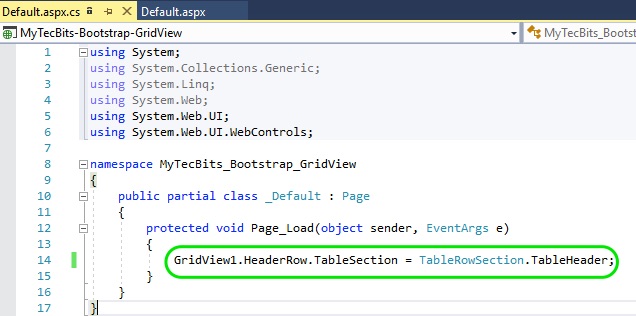
Once compiled the GridView becomes a plain HTML table with rows and columns. But the table does not have a segregated head <thead> and body <tbody> sections. To segregate the table by head and body, you have to add a line of code in the code-behind file. In the code-behind file add the below line of code. (Considering GridView1 is the ID of the GridView). Using the HeaderRow.TableSection property, you can set the location of the table header . This will help the bootstrap class to style the table’s header row and the body rows accordingly.
GridView1.HeaderRow.TableSection = TableRowSection.TableHeader;
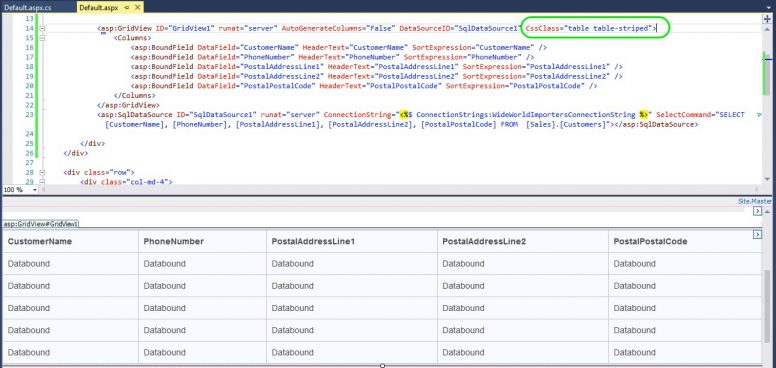
Now add the bootstrap’s css class for table in the GridView control HTML code (<asp:GridView ID=”GridView1″ …………………………….. >).
CssClass=”table table-striped”
 That’s all. You can build and run the project and see how the grid table is formatted. If needed, you can add more bootstrap table classes in the CssClass. Likewise, if you want to make the grid table responsive, wrap the div having the table class with table-responsive class in another div.
<div class=”table-responsive”>
Related Articles
- Details about adding bootstrap in ASP.NET, both in Web Forms and MVC.
- Step by step instruction on using bootstrap 3 with ASP.NET Web Forms without using NuGet Bootstrap Package.
Reference
- About GridView control in MSDN.
That article is nice but it’s not very scalable. As an example if you have a page of 100 records, how are you going to make horizontal scroll bar always visible to your end users? Your method above would force the users to go all the way to the bottom of the page (100th record) to see additional columns.
This works in Boostrap 3 – do you have a version for version 4 of Bootstrap?
Hi Robert,
Not yet, will try to update this for bootstrap 4 soon.
Hi Robert,
I have added a new article on using bootstrap 4 in ASP.NET grid view @ http://www.mytecbits.com/microsoft/dot-net/bootstrap-table-with-gridview . Hope this will help you.