
jQuery-UI is the child of jQuery. It is a user interface framework build with jQuery Library. Do you know that jQuery-UI comes with Visual Studio 2012 by default? Yes, the default User Interface framework which comes with Visual Studio for Web is jQuery-UI. When you create a Web Forms project or MVC project (Not an empty project), jQuery-UI Libraries will be available in it. It will even have the essential widgets to create a basic website.
For this article, I am using Visual Studio Express for Web 2012. You can either use either Visual Studio editions like Ultimate, Premium, professional or Team Server. Alternatively, you can download Visual Studio Express for Web 2012 from https://visualstudio.microsoft.com/.
This is a basic example by modifying the Site.Master page and the Default.aspx page using jQuery-UI’s style sheet and widgets.
For your convenience, you can copy the source code of Site.Master and Default.aspx from the article jQuery UI with ASP.NET: Sample Source Code.
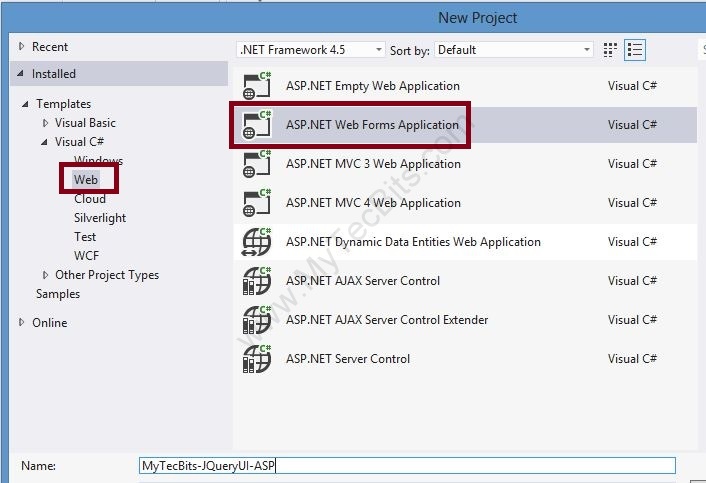
Steps to create your first ASP.NET web forms project with jQuery UI:
- Launch Visual Studio Web Express.
- Create a new ASP.NET Web Forms Application.
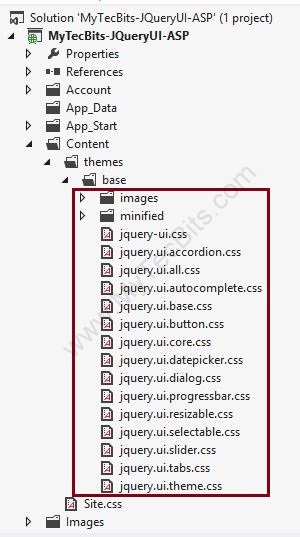
- Open the Solution Explorer and go to the folder Content >> Themes >> Base. You can see several jQuery-UI style sheet widgets are already available in the project.
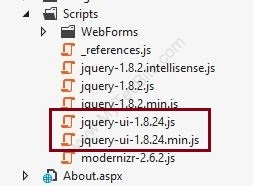
- Likewise, you can see jQuery-UI java script files within the Scripts folder.
- Now the project is created. The jQuery-UI framework needed for creating a basic website is also available in the project. You can start using the UI framework.
- Open the Site.Master Page.
- In the Site.Master page, in the <Head>……</Head> section, remove the codes other than the title and ContentPlaceHolder.
- Enter the below code instead of the removed lines of code. This line of code is to create a reference for the jQuery UI style sheet jQuery-ui.css.

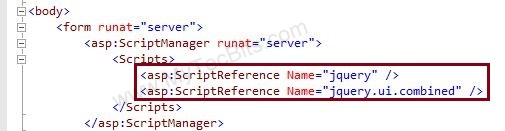
- In the ScriptManager section, remove all the script reference except the script reference for jQuery and jQuery-UI.
- In the <header> tag, change the class to “ui-widget ui-widget-header ui-corner-all”. This will create the header with style in the jQueri-ui.css with a border line and rounded edges.
- Remove all the other codes within the <header>…..</header> section and just enter the title of the project.

- Remove the code from below the closing of </header> section until the <footer> section. Then create table structure with <div> tags. The table should have two columns. The left column is used for navigation urls and the right column will have the ContentPlaceHolder for FeaturedContent and MainContent. In the main div tag, set the class to jQuery-UI style “ui-widget ui-widget-content ui-corner-all”.
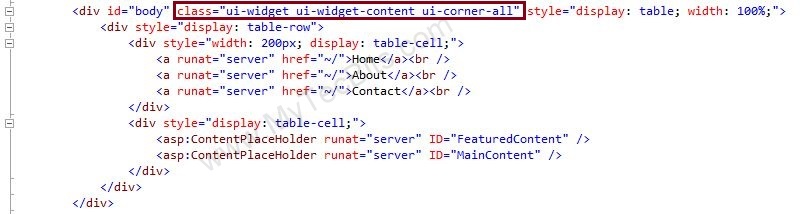
- Use the jQuery UI style in <footer> section as well.

- Now open the Default.aspx file.
- In the FeaturedContent content section, just leave the <H1>….</H1> section and remove the other lines.

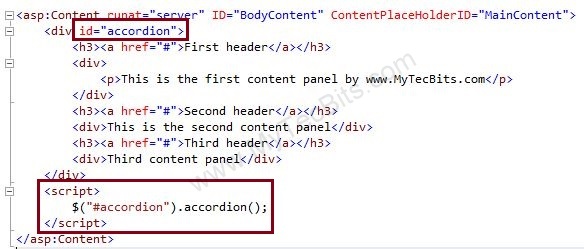
- Remove all the lines from the MainContent place holder section and enter the below shown code. This code is to create an accordion widget with jQuery-UI. Accordion is one among the widgets in jQuery-UI similar to the vertical tabs, which will collapse/expand on clicking the tab heading.
- Now you are ready to build the solution.
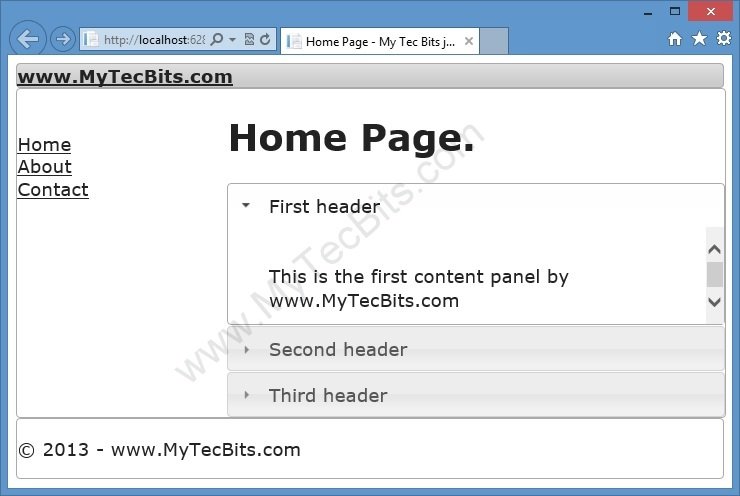
- Build the solution by hitting F5 key or by clicking the green arrow button in the tool bar in Visual Studio. On successful completion of build the browser will open with your first ASP.NET web form with jQuery User Interface.
- You and copy the source code of Site.Master and Default.aspx from the article jQuery UI with ASP.NET: Sample Source Code.
Beaulin,
This worked perfectly for me; however, it didn’t work for me when I changed from accordion to tabs. Would happen to have a working example of using tabs within the same sort of structure (Site.Master & Default.aspx)?
Thanks!!!
For me this code is not working properly after doing everything with your “tutorial”. This is my working code:
This is my heading section in the Site.Master file:
I have to give references to the VS program where to find the scripts and the style sheet because without this the accordion is shown without styling.
P.S: I checked it without the jQuery references. Should be a reference to them in the code.
This is my solution. Thank you. Tamas
This article of no use as their as not single asp object was created in this Example it is as using as HTMlL control and putting JQuery UI in It its on no Use
Vishal,
Thank you for your feedback. May be this article is no use for you. But there are people like me, who need this as a “Hello World” kind of basic instruction, to start using jQuery.UI. In fact this is my first jQuery.UI experience with web forms. Any way, I’ll consider your feedback and try to go more in depth in my future articles.
How are you able to use FeaturedContent in Default.aspx when you make no reference to it in Site.Master?