
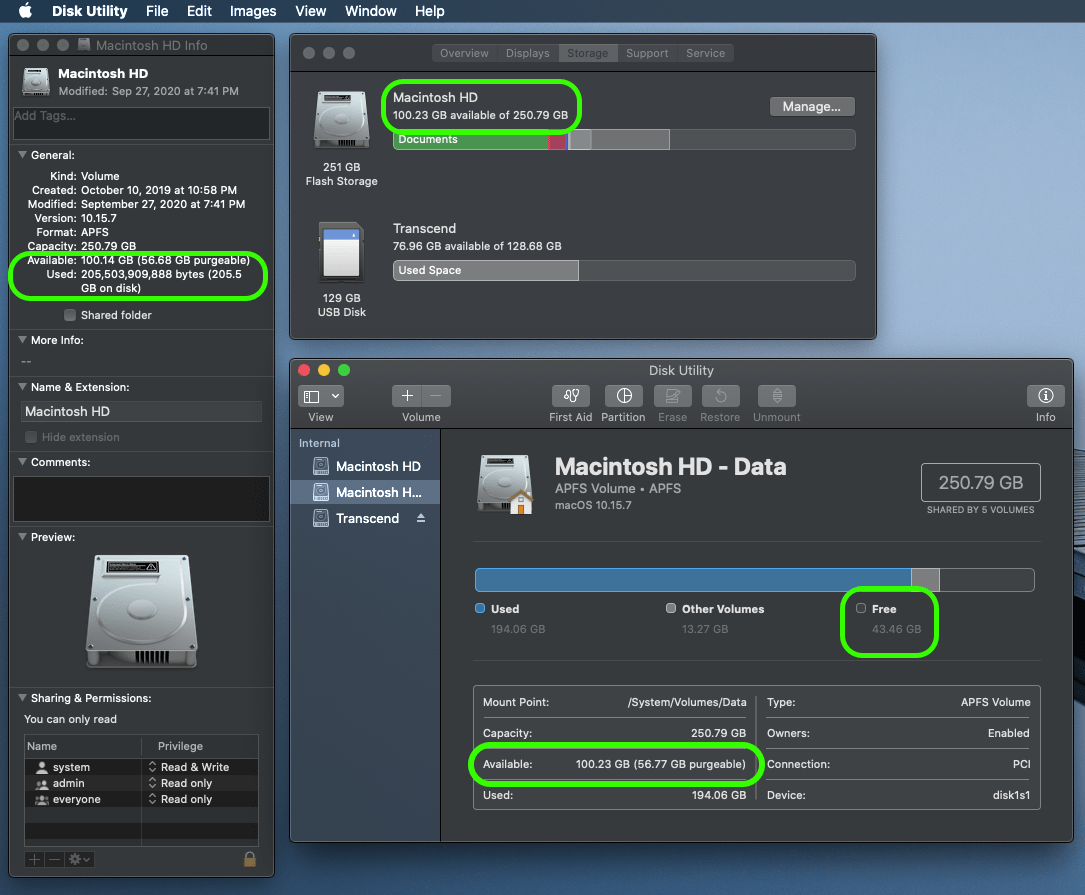
Recently, to check the used storage space on my MacBookPro, I opened the Storage tab in About this Mac and found that there are more than 100 GB of free space. After some time to format my USB flash drive, I launched the Disk Utility. I was shocked to see that the free space in my main hard disk is just around 42 GB.
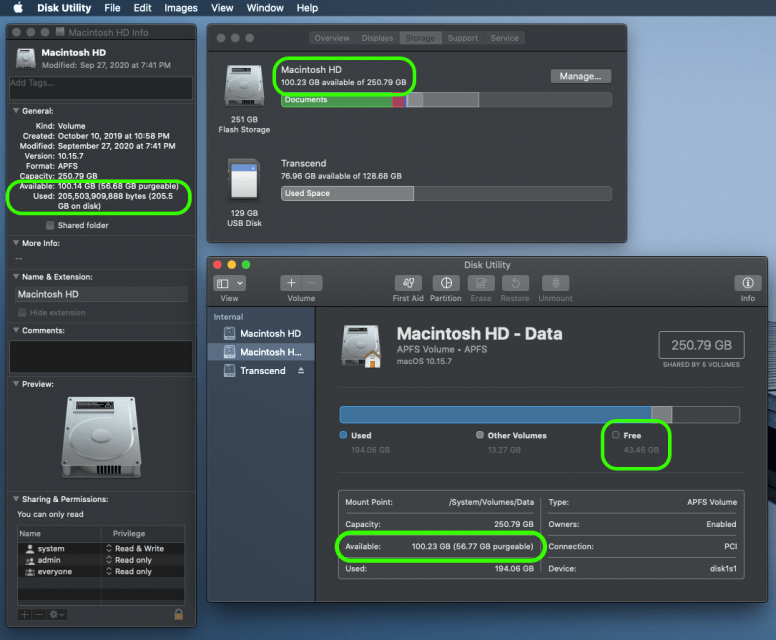
Where gone the remaining free space in just few minutes? I went back to the storage tab in About this Mac window. It was still showing more than 100 GB of free space. Then I checked the Get info window of the hard disk form the finder, it showed that the hard drive has more than 100 GB of free space. It also displayed an additional information that more than 56 GB of the free space is purgeable. After comparing these numbers, I understood that the Disk Utility is deducting the purgeable storage from the free storage. That’s why these screens are showing different free spaces.
After getting the answer for difference in free space shown in different windows, I got couple of more questions:
- What is purgeable storage?
- How to remove the purgeable storage?
On searching, I figured out the details of purgeable storage and how to reduce them. I would like to share what I learned and what I did to free up some of the space in my laptop. Let’s see.
Purgeable storage
Purgeable storage is the space occupied by files in the drive which were identified by the macOS system as removable in case if it needs more free-space. Here is the list of few of the major contributors of purgeable space:
- If the backup disk is not accessible by time machine, it uses the local storage to store the snapshots. These files are automatically purged when the backup disk is accessible by time machine. Until then, these snapshot files are classified as purgeable files.
- Old files which are not used for a long time. (Not sure how long!)
- If a local file is synced with iCloud, then the local file is considered as purgeable.
- Abandoned files and cache which are left after uninstalling an application.
Reducing purgeable storage
Normally, you don’t need to remove the purgeable file form the storage space. macOS will automatically remove them when the system needs more free-space.
However, if you prefer to remove the purgeable space then one way is to use one of the third party software like CleanMyMac X, DaisyDisk, etc…
Another way is to manually free up the storage space by removing the purgeable file. In my situation, I do not want to remove 100% of the purgeable files, instead I need to free up most of the purgeable space with minimal effort. So, I followed the below simple and quick steps to free up space.
- Made sure the backup drive is connected and accessible to the macOS. Several minutes after connecting the backup device, the local snapshots were removed automatically.
- Emptied the trash.
- Went to menu bar, Mac icon >> About this Mac >> Storage tab >> Manage >> Documents. From the Large Files and Downloads, removed the files which are older and no more used.
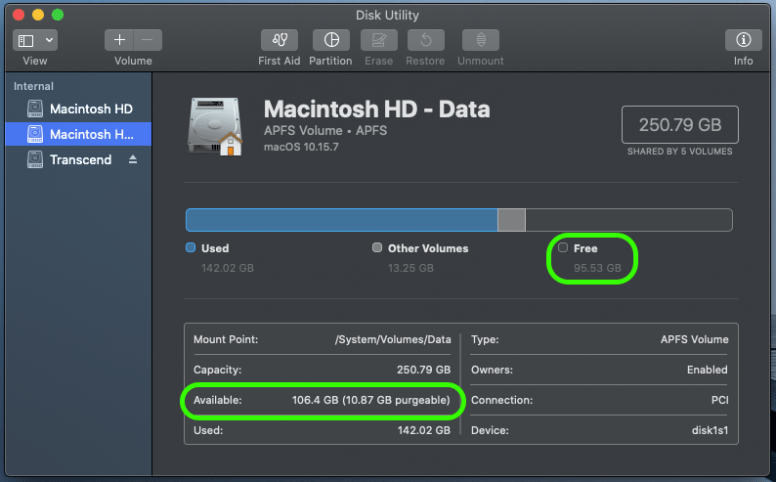
After doing this simple maintenance tasks, I could see considerable reduction in the purgeable storage. It has come under 11 GB and the free space now above 95 GB.
I don’t want to spend too much time messing around the old files just to retrieve the remaining 10 GB of purgeable storage. The current free space is more than enough for me. However, if you are in a situation to remove all the purgeable files, then I would recumbent using one of the third-party cleaning tool.
Related articles
Reference
- About time machine local snapshots at Apple Support Docs.