
Today, let us see how to run or launch Visual Studio Code from the macOS terminal. This tip will be helpful for people who are frequently using the terminal in macOS. Follow these steps to launch VS Code from the macOS command line and start editing files in the folder you are currently in the terminal.
- Install Visual Studio Code in macOS and make sure the app file Visual Studio Code.app is placed in the Applications folder.
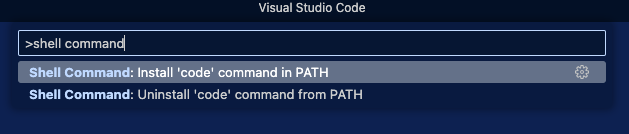
- Launch VS Code and open the Command Palette by pressing Shift, Command and P keys.
- In the command palette type in ‘shell command’. From the list select the command Shell Command: Install ‘code’ command in PATH.
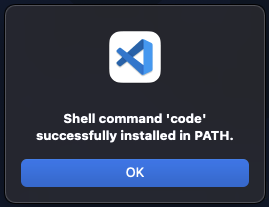
- Once installed, you will see a message Shell command ‘code’ successfully installed in PATH.
- Launch the terminal window. If it’s already open then close it and launch it again.
- Type in “code .” to launch visual studio code and start editing files in the folder you have selected in the terminal.
Note
The dot ‘.‘ at the end of the command “code .” is used to specify the current directory. If you want to open a directory other than the current directory, replace the ' with the path to that directory. For example:.'
code ~/Projects/OurProject
Hope this helps.
Tools used
- Visual Studio Code (1.75.0).
- macOS Big Sur (11.7.2) intel.
Reference
- More about running Visual Studio Code on macOS at VS Code Docs.
this blog information is very usefull