
I recently decided to learn Python language for one of my project. Currently I am in the process of setting up my macOS system for Python dev environment. I have installed the latest version of Python 3.x on my MacBook Pro. As I am already using VS Code IDE, I’m thinking of using it for Python programming. Here, I will share with you the steps I took for setting up Visual Studio Code for Python on macOS.
Tools & Technologies Used
- macOS Mojave (10.14.5)
- Visual Studio Code (1.36.0)
- Python (3.7.3)
Steps For Setting Up VS Code For Python
Prerequisites
- Install the latest 3.x version of Python. You can find the installation steps here.
- If VS Code is not already available on your mac, you can download and install it from https://code.visualstudio.com/. Now go for the next step of installing the Python extension for VS Code.
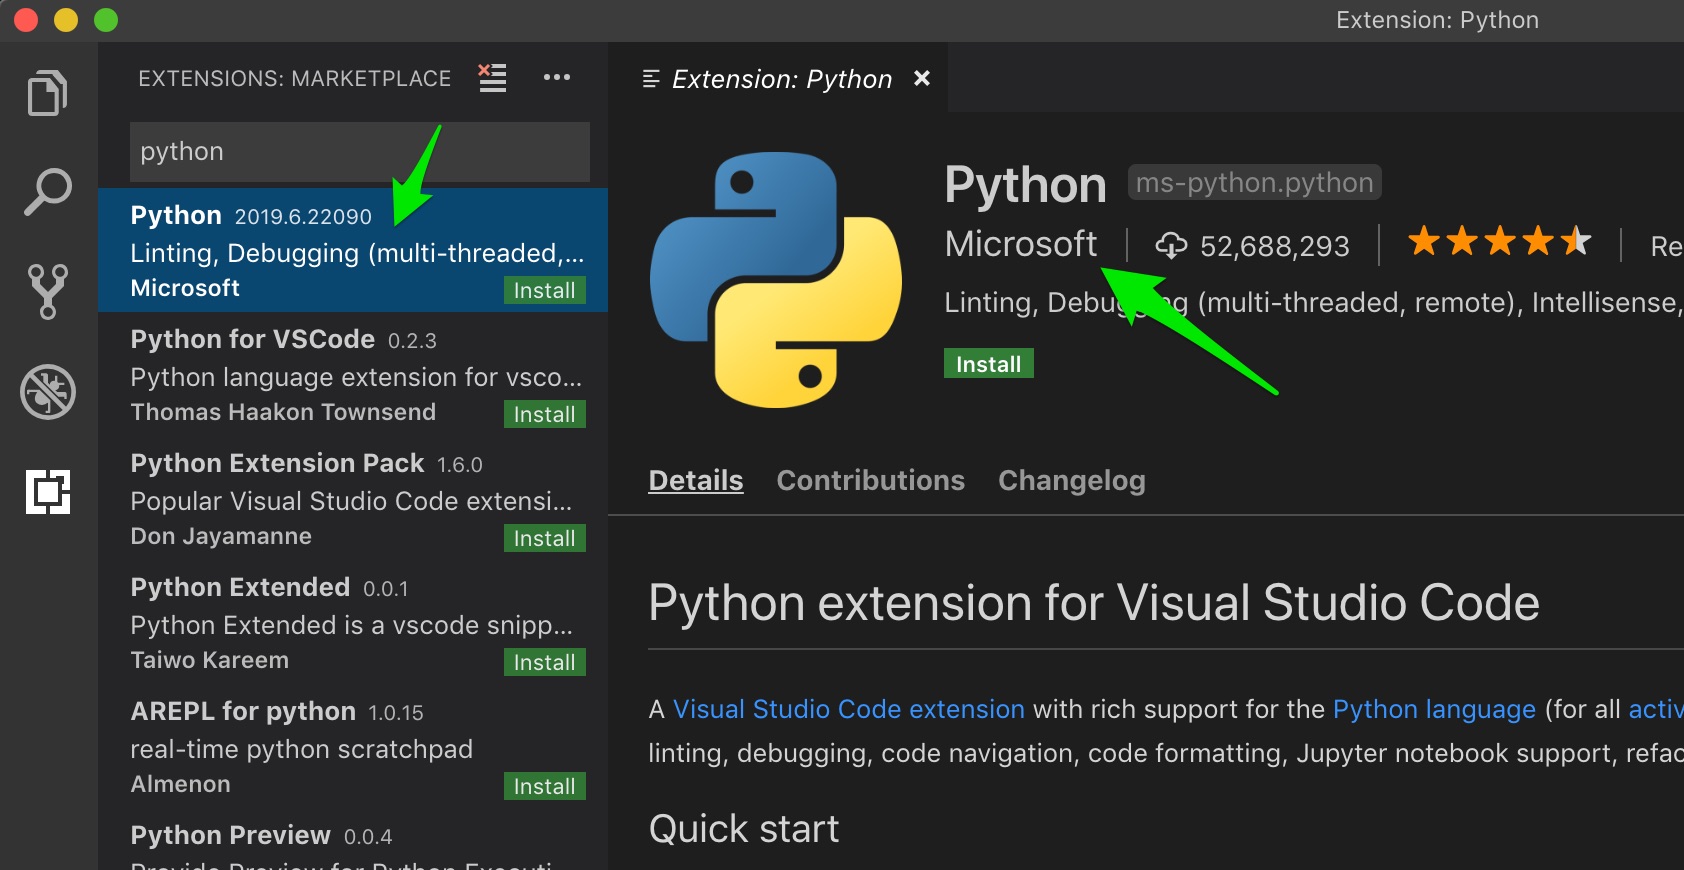
- Launch VS Code and go to extension tab. Search for python in the extensions market place. You can find several Python extensions in the market place. Install the extension named as Python which is maintained by Microsoft. Most probably it will be on the top of the list.

Choosing The Python Interpreter
- Launch VS Code.
- Open a folder for Python workspace by going to Files >> Open … >> Select or create a folder if the finder window and open it. This will be your Python workspace.
- Now, open the Command Palette, by pressing Shift, Command and P keys.
- In the Command Palette, type in and select Python: Select Interpreter.
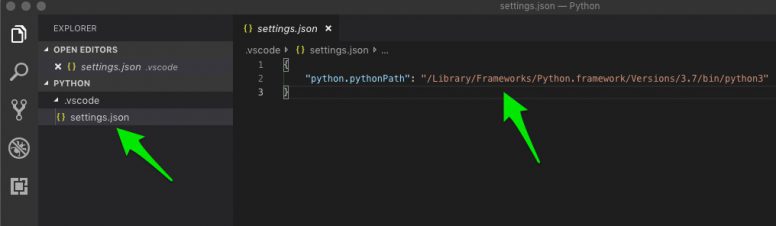
- From the list of interpreters, select the appropriate Python 3.x interpreter. This action will create folder .vscode inside your workspace. Inside this .vscode folder, you can find settings.json file which stores the settings specific to the workspace. In our case you can find the Python interpreter path.
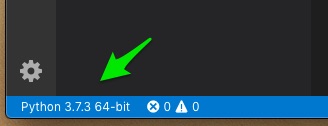
- At the bottom left cornet of VS Code window, you can see the Python version as well.
Now Visual Studio Code is ready for interpret and run Python code. It is time to create a Python source code in VS Code and check it.
Create Your First Python Code In VS Code
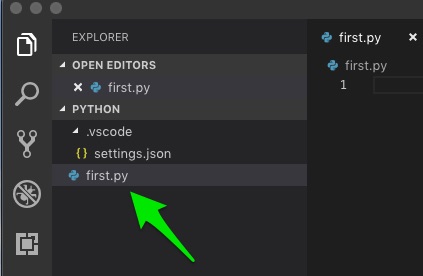
- In the Explorer panel, press the New File icon against the workspace folder. Enter the name of the file with extension .py. I have named it as first.py.
- In the newly created file, enter some python code. For example, I used the code below, where a string value is assigned to a variable and the variable is passed as a parameter to print function. While typing the source code, you can see the intellisense kicking in showing you the autocomplete and function param value functionality. This is a indication, that the settings we have done before were correct.
message = “Hello Python World!..”
print(message)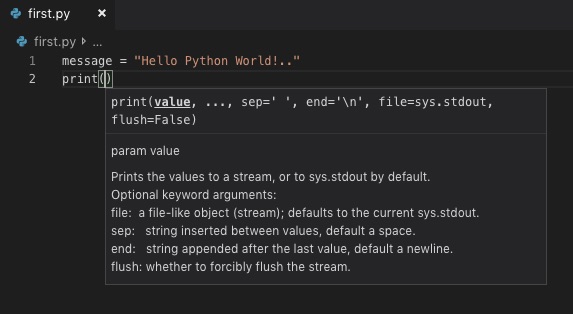
- To run this code, right-click somewhere in the editor and select Run Python File in Terminal.
- This action will open the terminal panel at the bottom and run the python file against the selected interpreter. The result will be like this:

Configuring The Debugger
We have completed the setups required to run the Python source code. Now we will go over the configurations required for debugging Python
- In VS Code, press the debug icon in the sidebar.
- Then press the configure icon.

- From the Command Palette, select Python File.
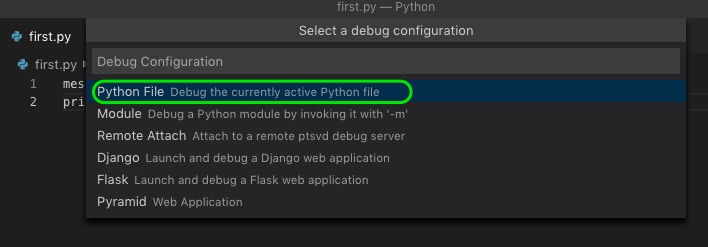
- This action will create a configuration file called launch.json under the .vscode folder in the workspace. By default this file will have the most common Python debug configuration settings.

A basic Python debugger configuration is now complete. VS Code is now ready for debugging Python code. You can edit the launch.json file and modify or add configuration settings. Read more about debugger configuration here. Now we will see how to use the debugger
Using The Python Debugger
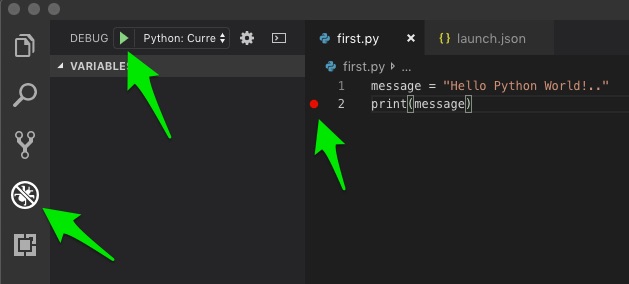
- Open the Python file.
- Set a breakpoint on the line having the print comment, by pressing the left gutter just before the line number.
- Press the debug icon at the sidebar to open the debug panel.
- Press the debug green arrow at the top of the debug panel.
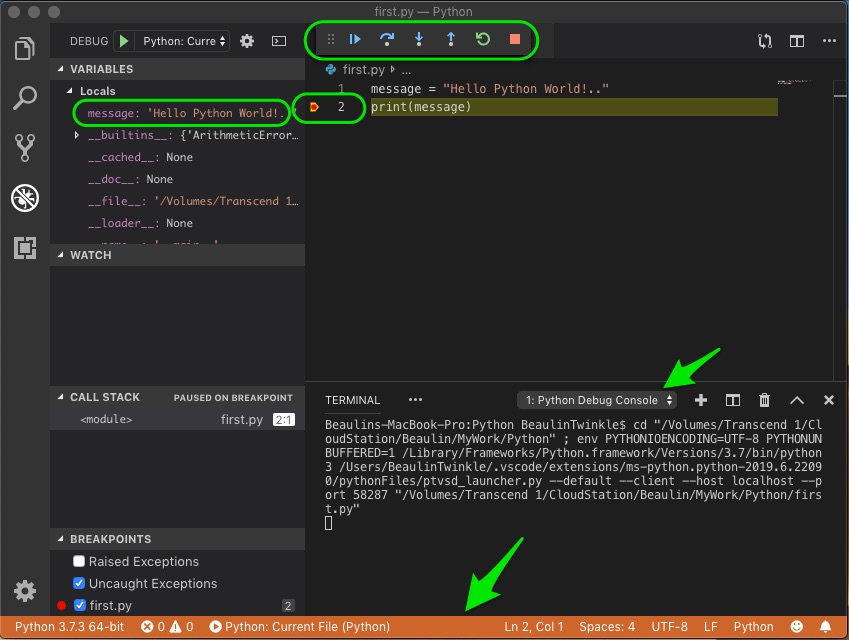
- The debugger will start running and stop at the breakpoint. By this time, you will notice some changes in the editor. A debug tool bar will appear on top, which you can use for continue, step over, step into, step out, restart and stop the debugging. In the debug panel you can see the variables and their values. A Python Debug Console appears at the bottom. The status bar changes color to orange.
- If you hover the mouse pointer on a variable in the editor window, it will show the value stored in it.
- Press continue icon in the debug tool bar to finish debugging and get the result in the terminal console.
Conclusion
We have covered setting up a python workspace in Visual Studio Code on macOS along with basic debugging configurations.
Next Step
- Installing Python packages and using them in VS Code.
Please disregard my previous message. Despite the warning after doing the system install and after updating /etc/paths, I was able to complete this tutorial exactly as you have it. Sorry.
This no longer works as of VS Code 1.48.2 and Python 3.85. Microsoft advises on the Python plugin install page that Python itself needs to be installed through Homebrew rather than the package installer from the website (as you show in your Python install guide). So unfortunately, this guide no longer works from the point you say “right-click somewhere in the editor.”