
Earlier, we have seen how to setup Visual Studio Code for Python programming. The next important item you have to know is how to install packages for python on VS Code. For installing the packages, you have to choose the environment whether it’s global or virtual or conda. As a best practice, it is recommended to use the virtual environment for installing packages to be used for python project or workspace in VS Code. Here we will see how to create a virtual environment, install the packages and use them.
Tools & Technologies Used
- Python (3.7.3)
- Visual Studio Code (1.36.0)
- macOS Mojave (10.14.5)
To start with, we will create a virtual environment.
Creating Virtual Environment
- In VS Code Editor, open the Command Palette, by pressing Shift, Command and P keys.
- Search and start Terminal: Create New Integrated Terminal. The terminal panel will open at the bottom.
- In the terminal run these comments.
python3 -m venv env
source env/bin/activate
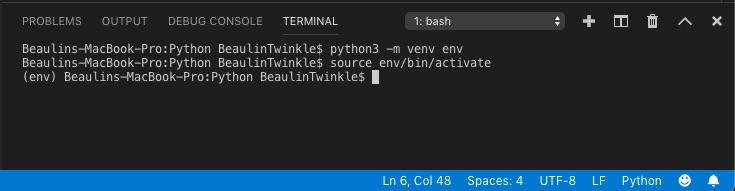
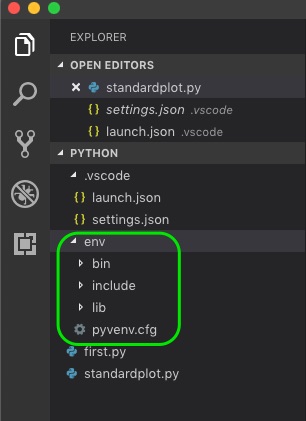
A new virtual environment called env is now created for the workspace. To see this, go to the explorer panel and expand the newly created folder under the workspace.
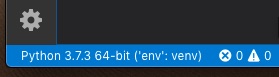
Open the Command Palette again and search and select Python: Select Interpreter. Now you will see the newly created virtual environmnet (something similar to Python 3.7.3 64-bit (‘env’, venv)). Select the virtual environment as your interpreter.
Virtual environment is ready. Now we will see how to install a Python package.
Installing & Using Python Packages
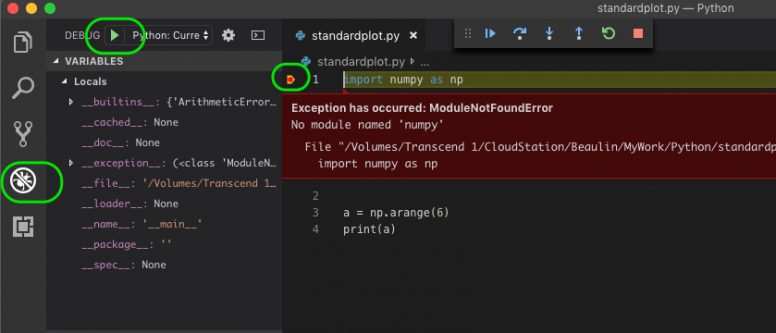
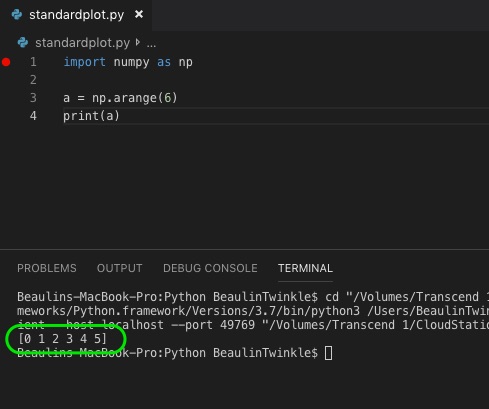
Before going to the installation part, let us see what happens if the package is NOT installed. For this demonstration, we will use the package NumPy. NumPy is used for generating multi dimensional array objects used for scientific calculation. Here is a simple program using NumPy package.
import numpy as np
a = np.arange(6)
print(a)
Let us run this program in the debug mode.
- Create a break point at the first line of the code.
- Open the debug panel and press the green arrow.
- Do a step over. You will see a ModuleNotFound error in the editor. This is because we haven’t installed the package in the virtual environment.
Now, let us see how to install the package.
- Open the Command Palette, by pressing Shift, Command and P keys.
- Search and start Terminal: Create New Integrated Terminal. The terminal panel will open at the bottom.
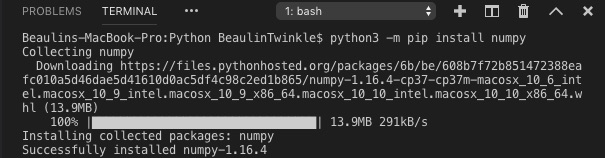
- In the terminal run this comment.
python3 -m pip install numpy
Now, run the program again. You will be able to get the result without any error.
In the workspace, where virtual environment is already available you can run the comment python3 -m pip install <package-name> for installing more packages as needed.
Next Step
- Activation, installing and linting of Python program in VS COde using PyLint.
- Upgrade virtual environment python version in visual studio code python workspace.
Reference
- More about getting started with Python here.
Really appreciate the help! Your website is even clearer than vscode!
Awesome, that was exactly what I was looking for. Worked like a charm!
Thank you so much. great to hear that this article helped you.