
As a .Net client-server application developer, sometimes you may need to force your application to run as administrator. Though it is not an ideal solution to run an application always as an administrator, you may need it in certain unavoidable situations. One among the way is to add an application manifest to your application. Here I have provided the steps to add a manifest to the application and set the level to requireAdministrator, to force it to run as administrator. In addition, I have also provided a workaround to bypass the UAC prompt while launching the application.
Tools And Technologies Used
I have used C# windows forms client-server application developed using Visual Studio 2017 and installed on Windows 10 for this illustration.
Steps To Force .Net App To Run As Administrator
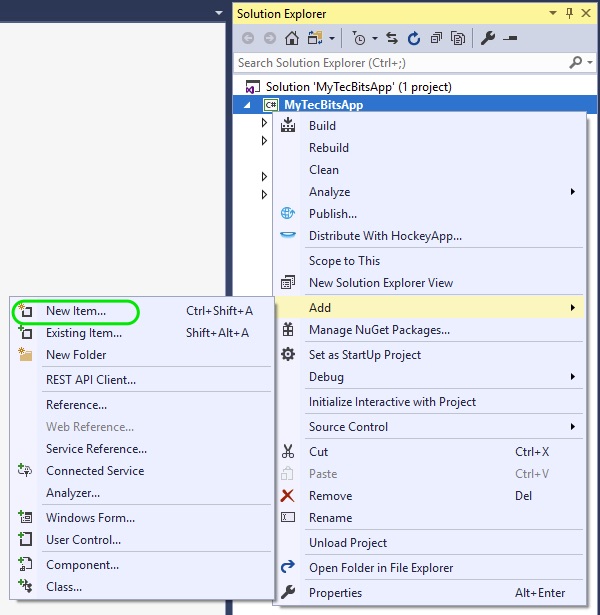
- Go to Visual Studio Solution Explorer, right-click the project and select Add >> New Item….
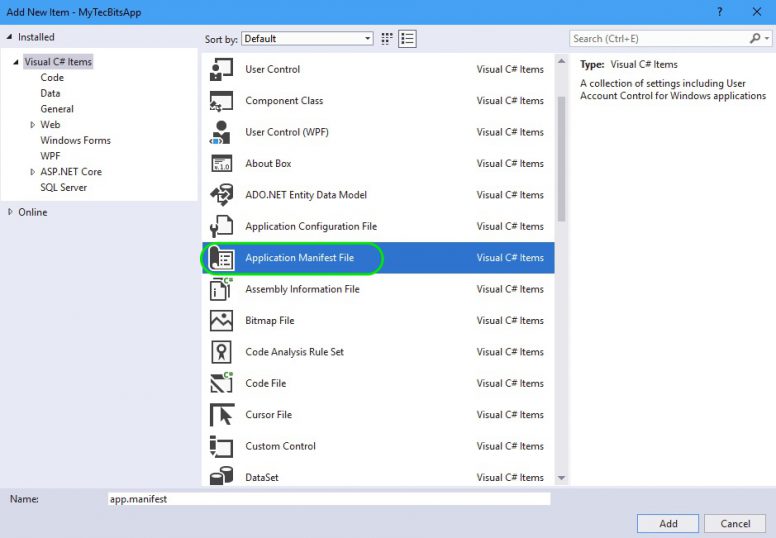
- In the Add New Item window, select Application Manifest File and press Add.
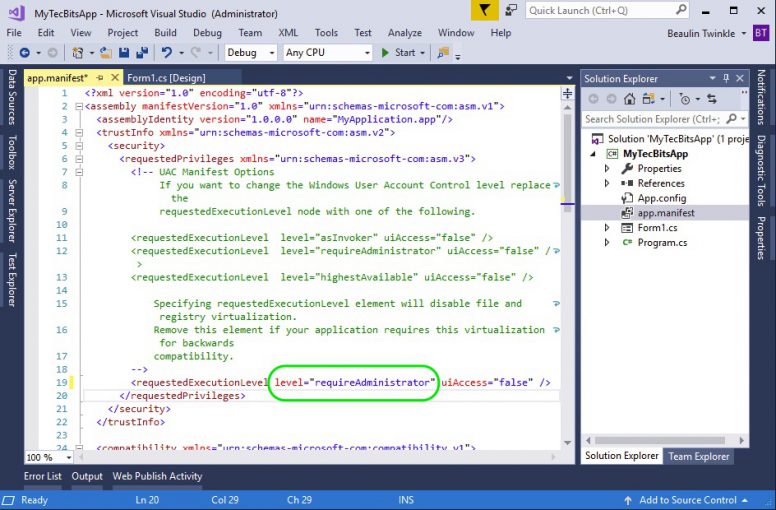
- Now, go back to solution explorer and under the project, find the .manifest file and open it.
- Find the requestedExecutionLevel element and change the level to requireAdministrator. <requestedExecutionLevel level=”requireAdministrator” uiAccess=”false” />
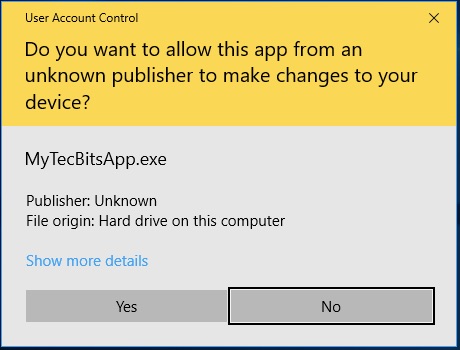
You are done with the application part. Now, your application will be forced to run as administrator. However there is a disadvantage. On launching the exe, it will get the User Account Control (UAC) prompt. The application will open only if you choose Yes in the UAC prompt. I will be annoying to respond to UAC prompt every time you run the application. You can follow the below steps to avoid the UAC prompt the specific application. This workaround uses the task scheduler to bypass the UAC prompt.
Steps To Avoid UAC Prompt
- Go to Task Scheduler and right-click Task Scheduler Library folder and select Create Task from the context menu.
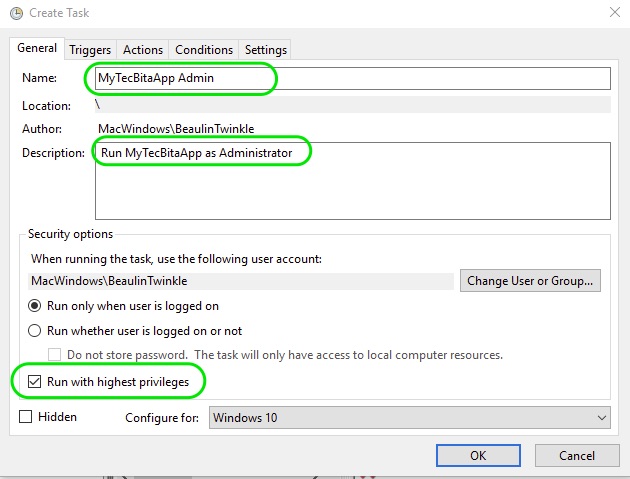
- In the Create Task window, enter name, description and select Run with highest privileges.
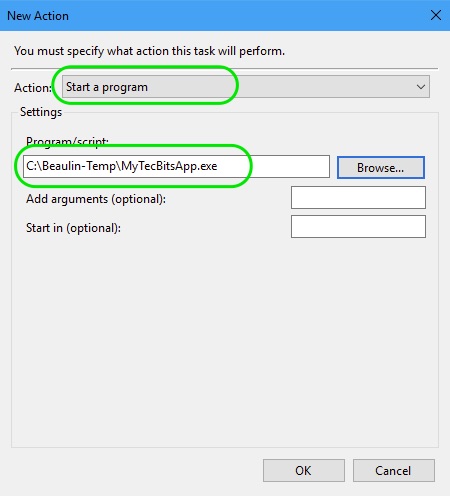
- Now, go to the Actions tab and press New… button.
- In the New Actions window, select the action as Start a program and browse the .Net application you want to run as administrator. Once selected, press OK to add the action.
- Now, go to Settings tab and make sure the option Allow task to be run on demand is selected.
- Finally, press OK to create the task.
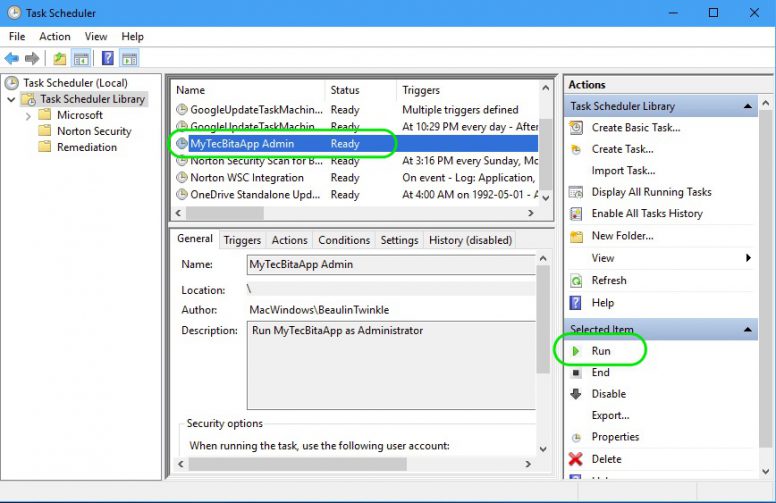
- The scheduler task is now ready. You can run the task to run the application without UAC prompt.
- Instead of going to task scheduler and run the task to launch the application, you can create a shortcut of the task.
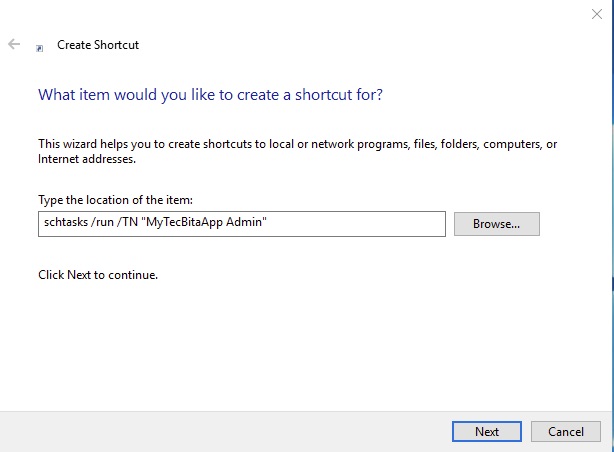
- To create a shortcut, right-click the desktop and from the context menu select New >> Shortcut.
- In the Create shortcut window enter schtasks /run /TN “{{NAME OF SCHEDULER TASK}}” in the location field and press Next. (NOTE: Replace {{NAME OF SCHEDULER TASK}} with the actual name of the scheduler task which you have created. The name should be inside double quotes.)
- Type in the name of the shortcut and press Finish.
Now, you can double-click the shortcut to open the application without UAC prompt.
Resource
- About creating and embedding application manifest at MSDN.