

In my previous article I’ve explained about various editions of SQL Server 2014. In this article, I’ll go through the SQL Server 2014 installation process with developer edition of SQL Server 2014.
UPDATE: On 1st June 2016, Microsoft releases the next version of SQL Server, the SQL Server 2016 for public. The editions and installation process of latest SQL Server version (2016 or higher) is available here and here. Currently SQL Server 2014 Developer edition is not available on visual studio dev essentials website. So please refer the article Get Free SQL Server Developer Edition to download the latest version of developer edition and install it.
To start with, we’ll go over the hardware and software requirements.
Hardware & Software Requirements For SQL Server 2014 Installation
- If you are planning to install SQL Server 2014 on a PC then you need Windows 7 SP1 or higher. For this article, I’ll be installing on Windows 8.1. If you are planning for server installation then, you need Windows Server 2008 SP2 or higher.
- .Net framework 3.5 SP1 is mandatory. Even if the operating system has .Net Framework 4 or higher, you have to install and activate 3.5 SP1 as well.
- Intel processor with a minimum of 1.4 GHz.
- Minimum of 1 GB RAM.
- Minimum 6 GB of hard disk space.
Video Instructions For Installing SQL Server 2014
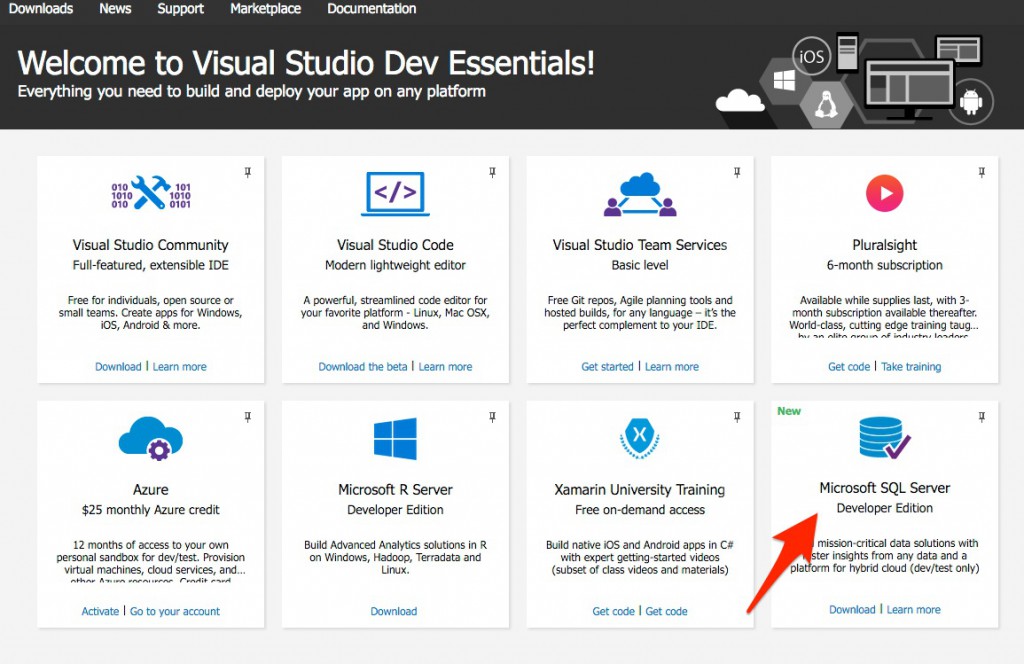
Downloading SQL Server 2014 Developer Edition
Follow the steps in the article Get Free SQL Server Developer Edition, to download the setup iso file.
Installing SQL Server
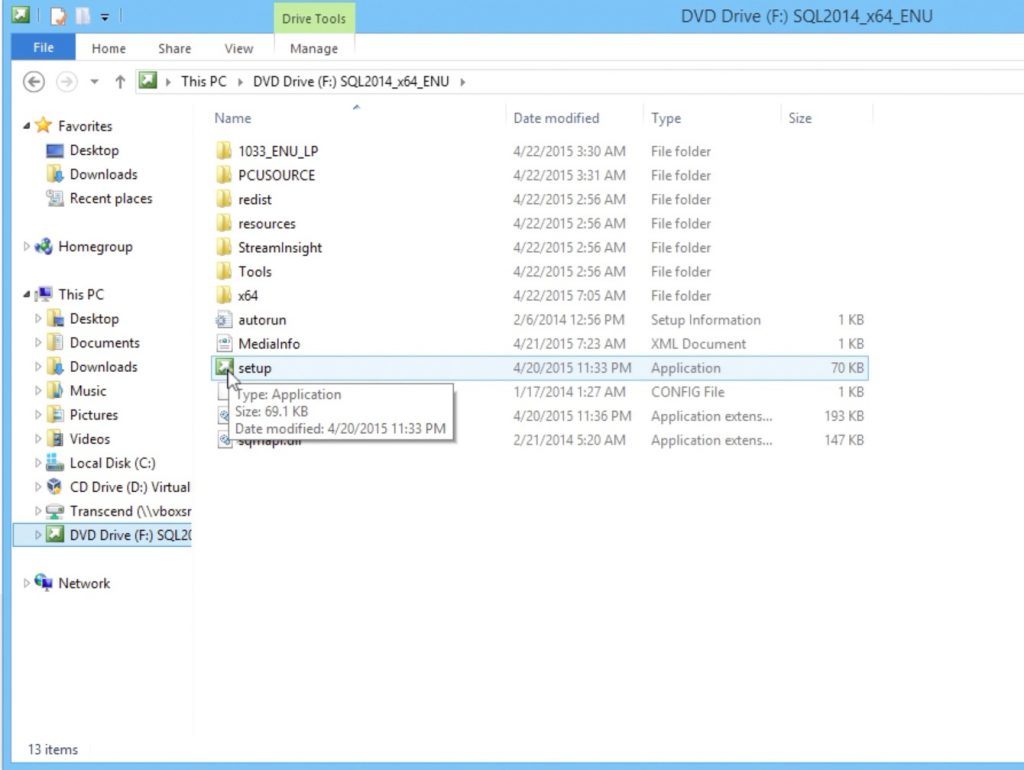
- Once you have downloaded the iso file, go to the downloaded location and mount the iso file by double clicking it.
- Then Go to the mounted drive and double-click the “setup” file.
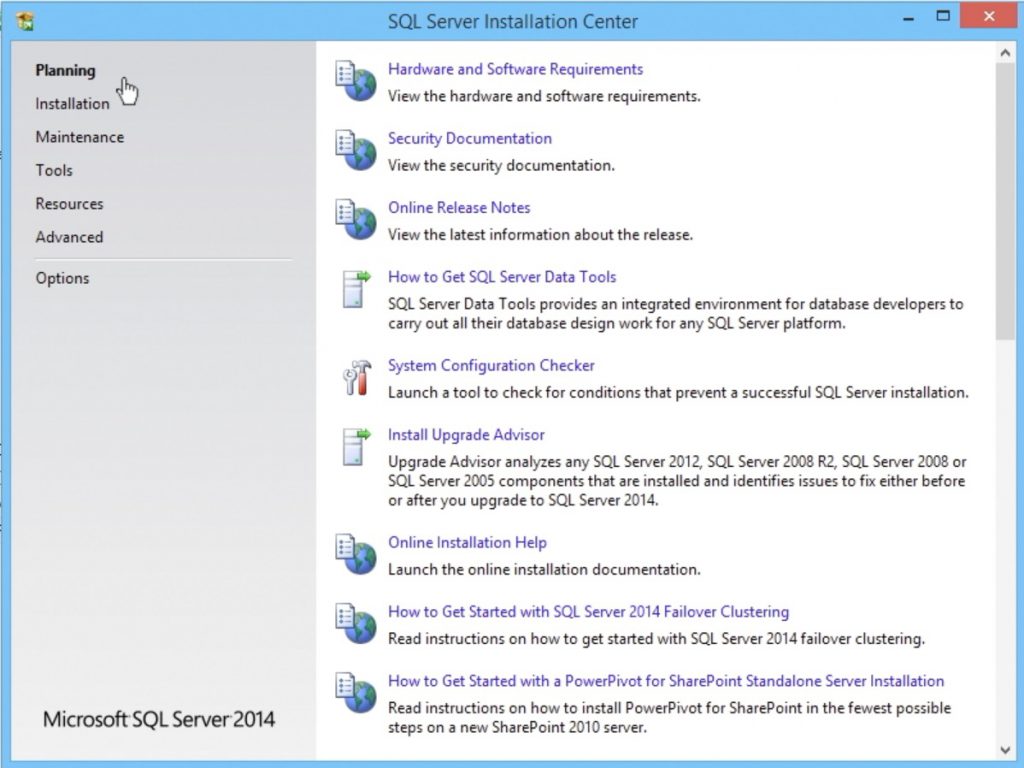
- It will launch the “SQL Server Installation Center” Window.
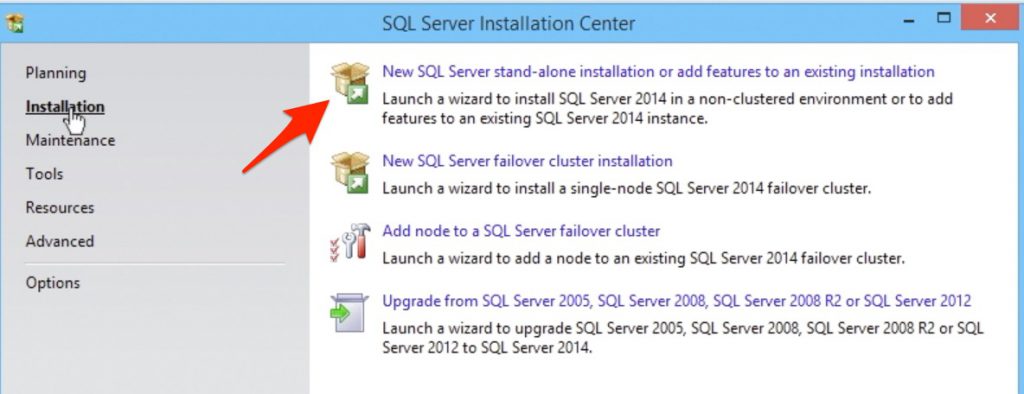
- In the installation center go to the “Installation” panel.
- Select the “New SQL Server stand alone installation…” option.
- It will launch the Setup Window. In the setup window, you have to follow the instructions in the screen and press next to navigate.
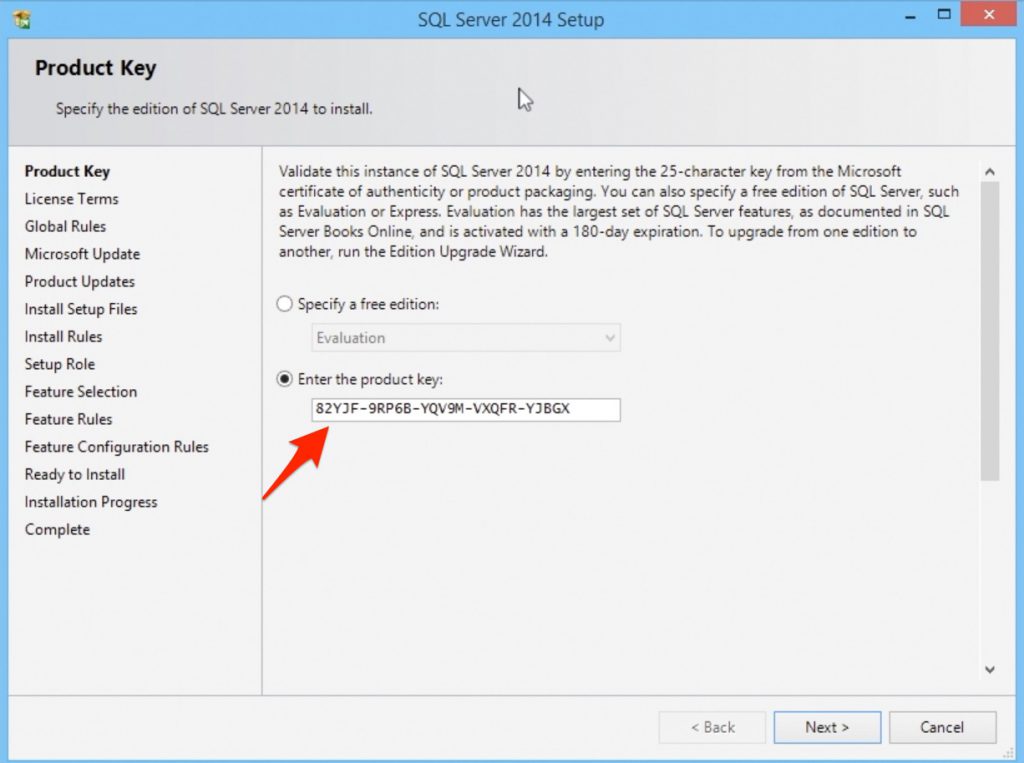
- The first step will be the product-key section. As you are installing the free developer edition, the product key will be available by default. So just press the Next button,
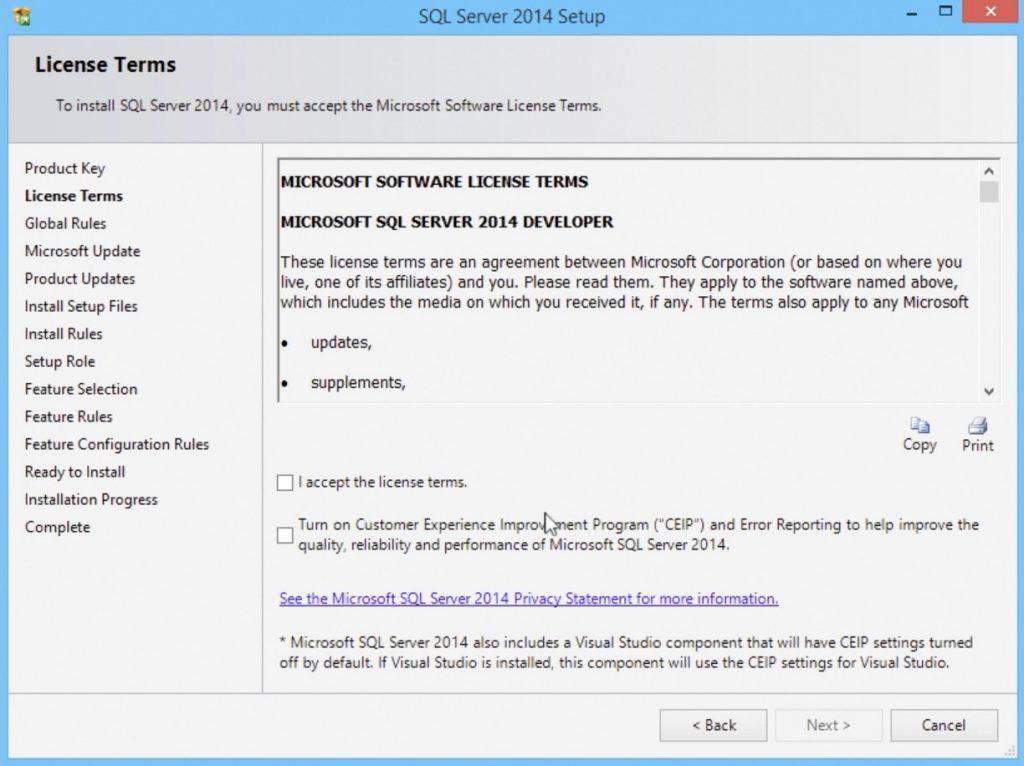
- In the License Terms section, Accept the license terms. Then you can either choose the “Customer Experience Improvement Program” or ignore it and press Next button.
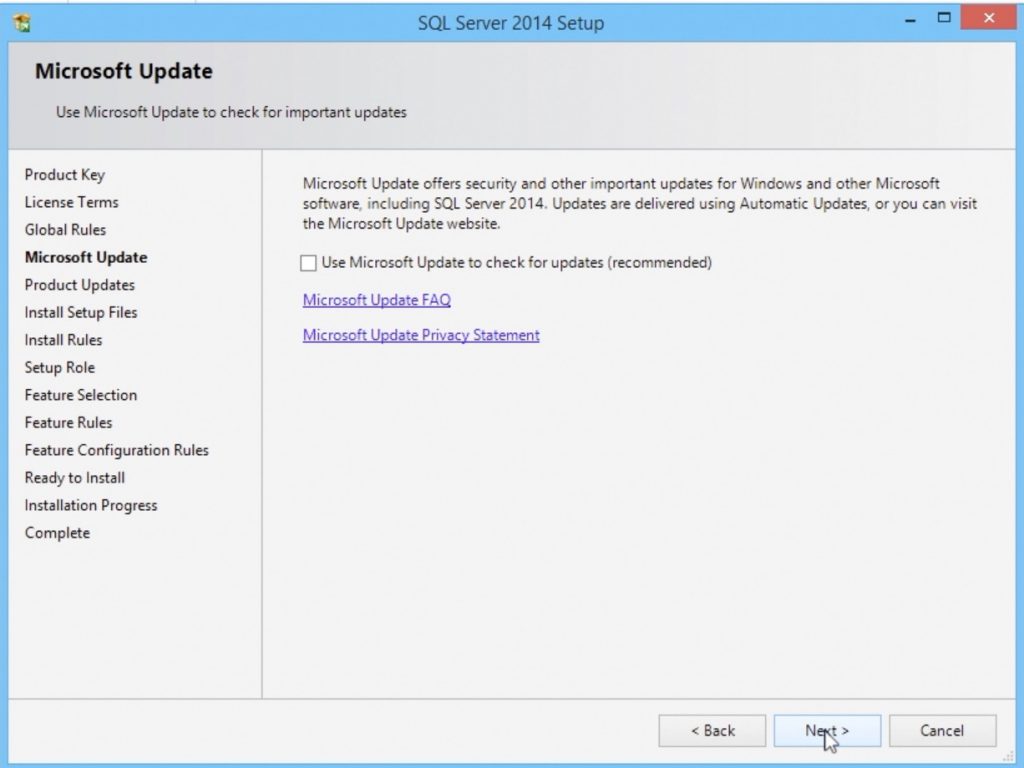
- The setup will now check for the global rules and progress to Microsoft Update section. It will be a good practice to select the check for Microsoft update option. But it’ optional. Either choose the option or leave it and press Next.
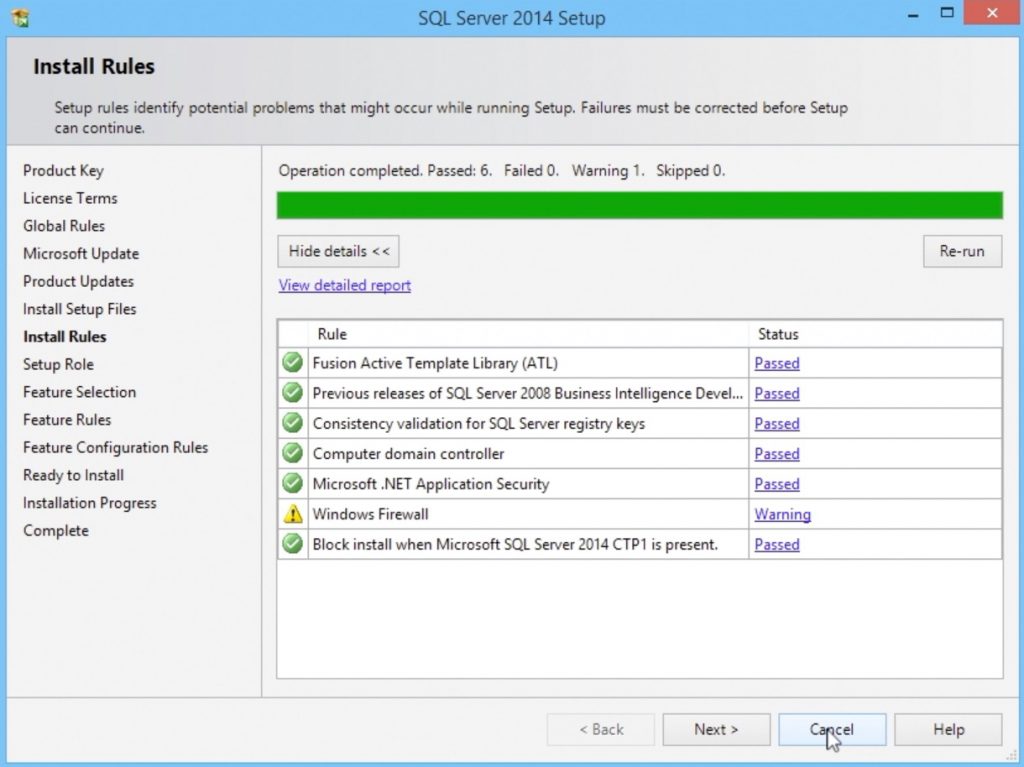
- Now the setup files required for the installation process are installed and proceeds to the Installation rule checking step. The rule checkup is over. I got a warning here. The warning is due to the firewall. As it is just a warning, I’m ignoring it and moving to the next step.
- In the setup role, there will be three options.
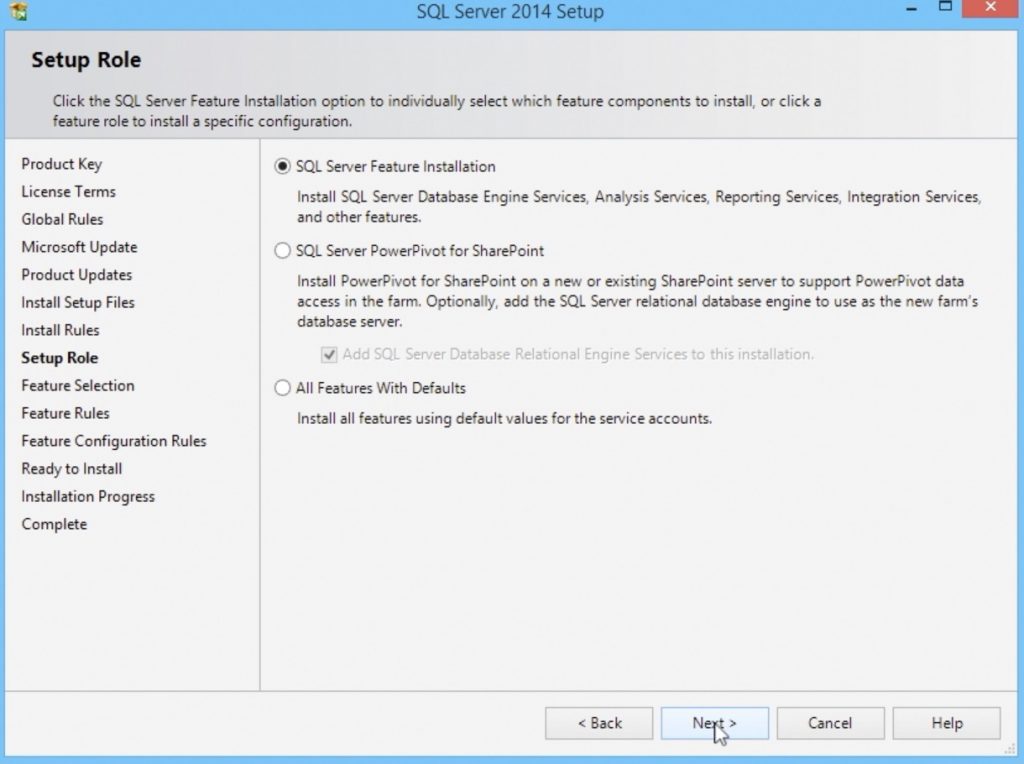
- The first option is “SQL Server Feature Installation”. If you choose this option, you can select the individual SQL Server components during the installation process.
- The second option is for installing SQL server powerPivot option for SharePoint. If you already have a share point installed then you may need this option.
- The last option is the default all feature installation. This option will install all the components of SQL server using the service account.
- I’m choosing the SQL Server Feature Installation option, so that I can select the individual components.
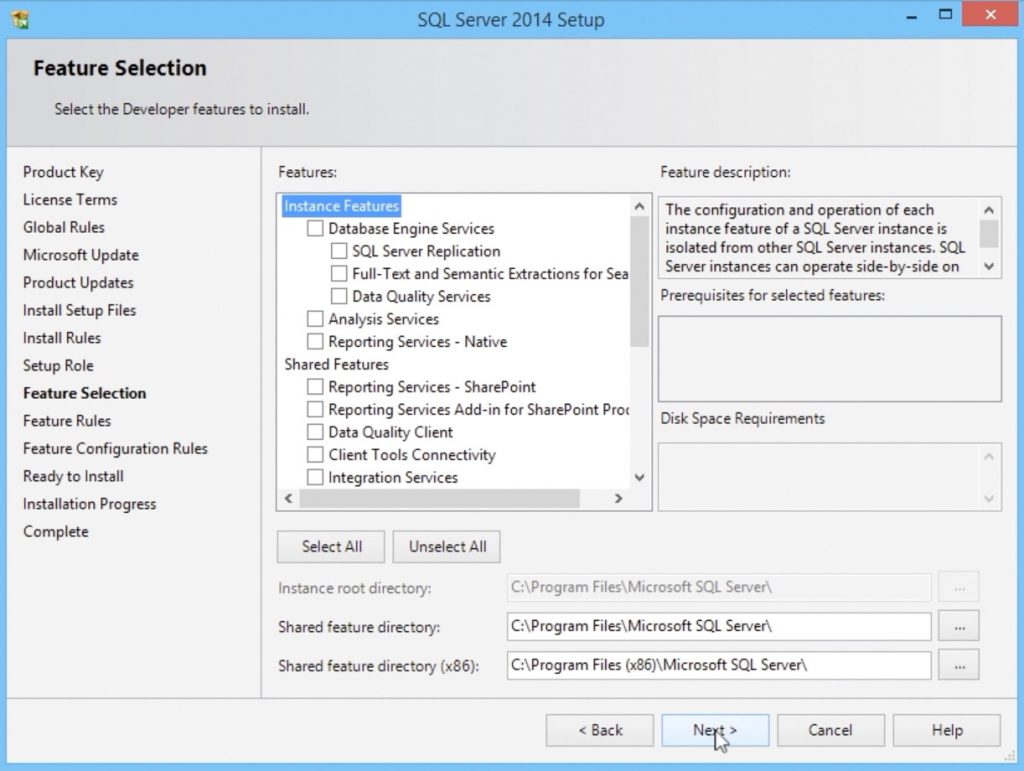
- In the next step, you can select the features you want to install. I’m choosing all the features. On selecting the features, you can see the disk space required for installing the selected features and the space available in the default drive. At this stage, you can change the hard disk drive or the folder of installation.
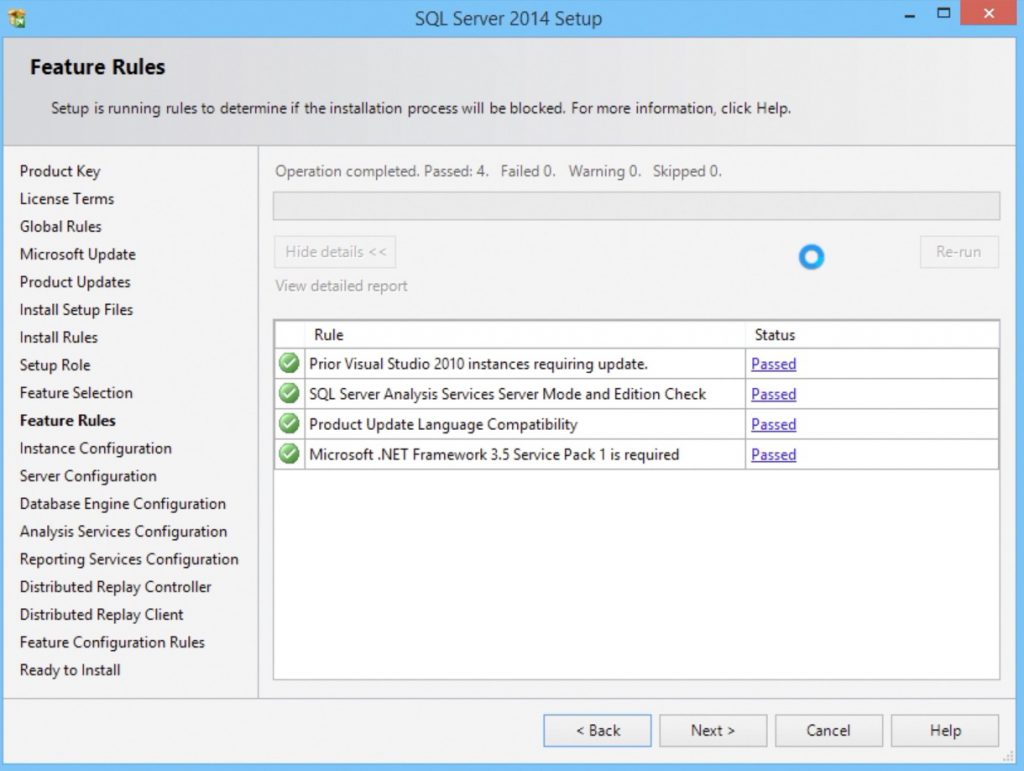
- Proceed to next step. In this step the setup will check for the prior requirement software based on the features we have selected in the previous step. If all the requirements are available in the server, the setup will proceed to the instance configuration step.
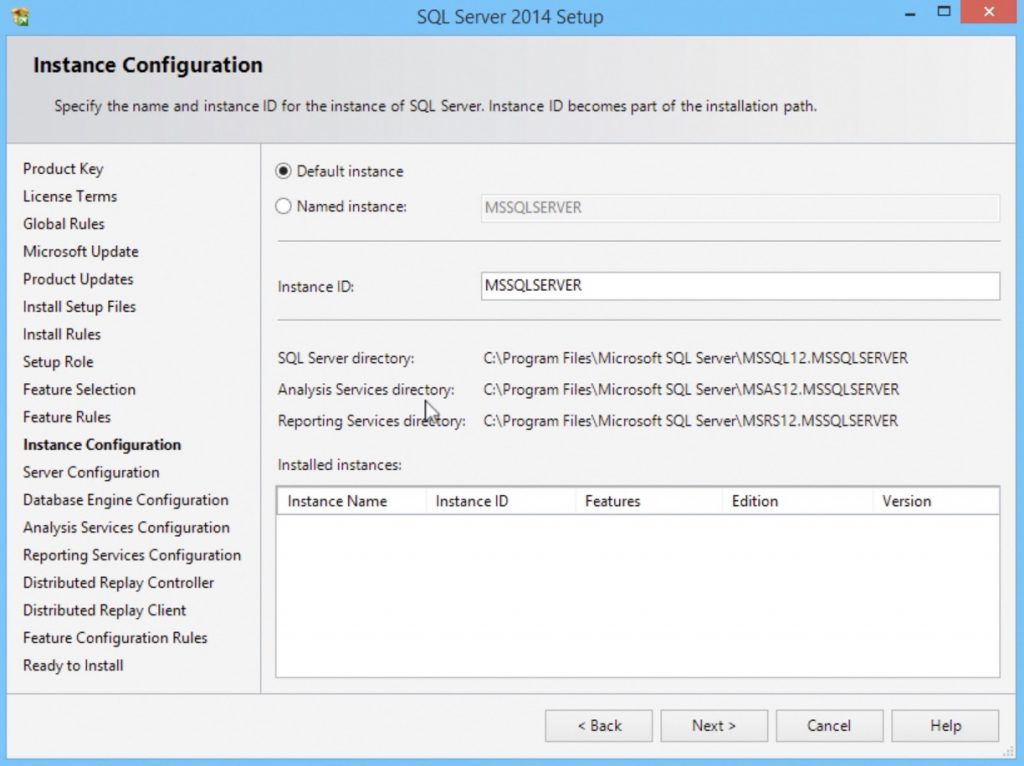
- In the instance configuration step, you can change the name of the SQL Server instance. For now I’m leaving this to default instance and moving to next step.
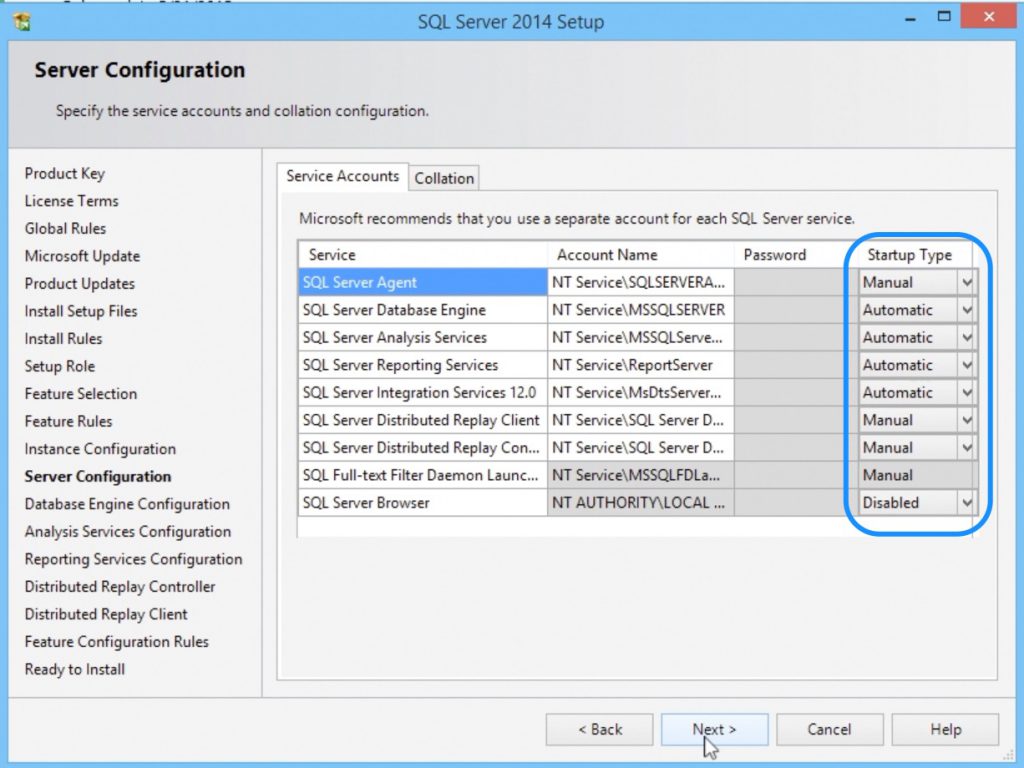
- In the server configuration step, you can change the startup type of the SQL Server services. For example, If you don’t want the reporting services to start automatically on booting the PC, then change the startup type to Manual. After setting the desired startup type, move to the next step.
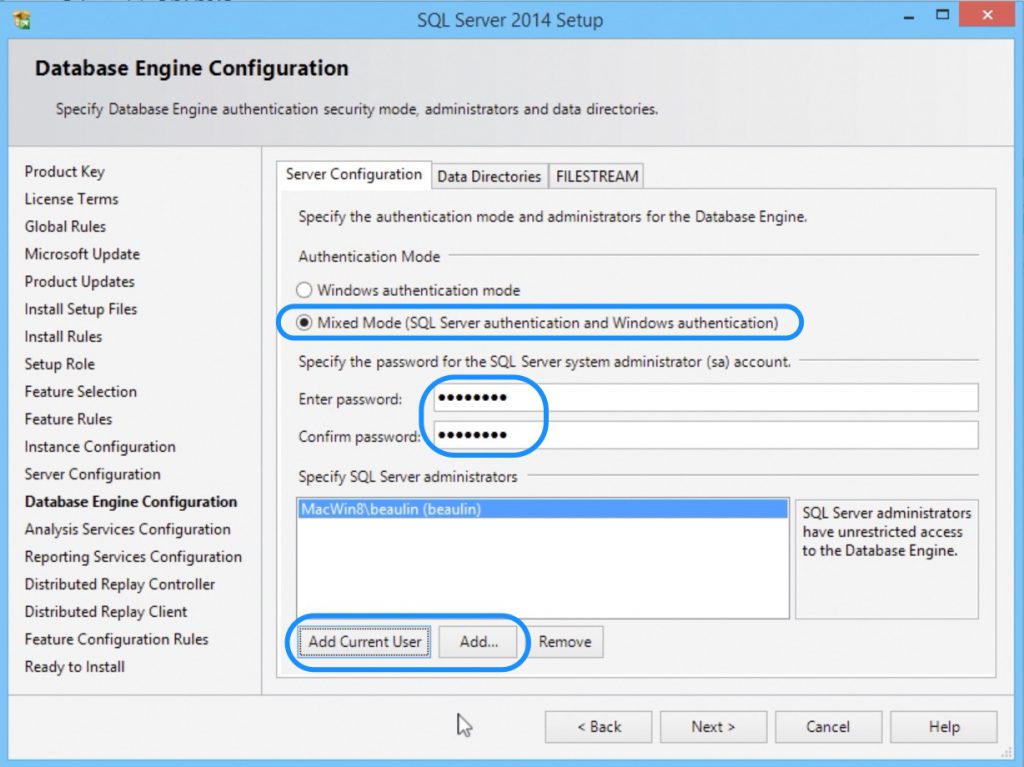
- In the database engine configuration step, you can just leave the authentication mode to Windows authentication mode. I would recommend to select the Mixed Mode, so as you can have another mode of logging in to the SQL Server if you want to login to the server or PC with different credentials. For mixed mode you have to enter the password for sa login and add a windows user as SQL Server administer. After filling these details, press next.
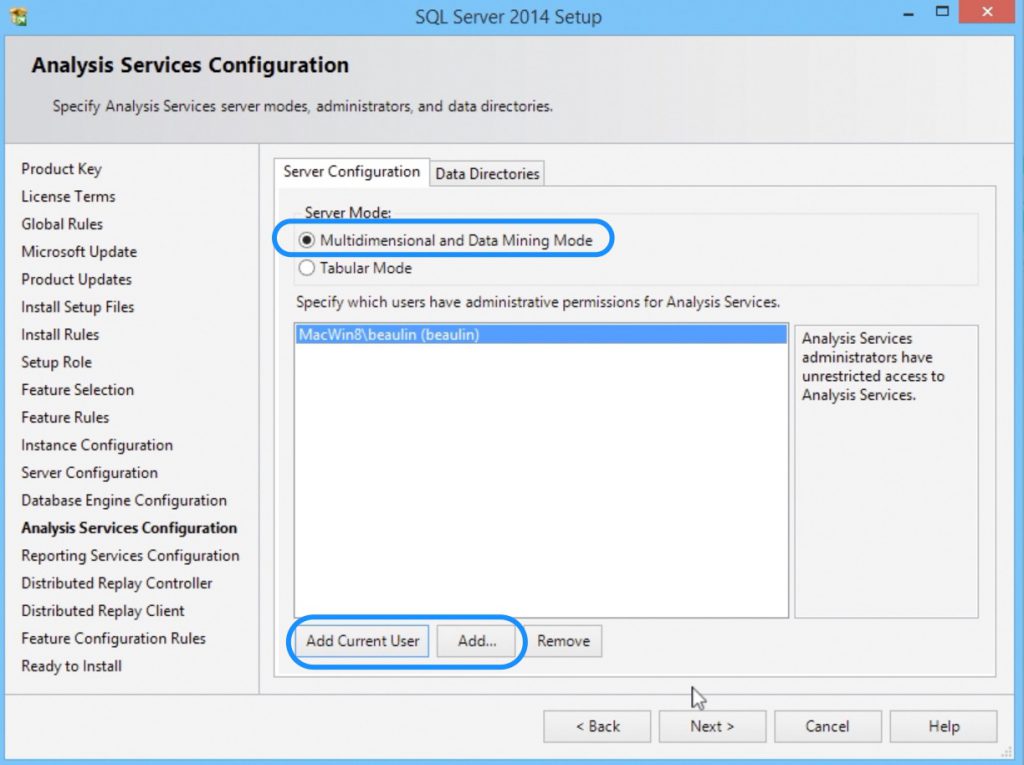
- In the analysis services configuration, add a windows user for analysis services administrator and move on to the next step.
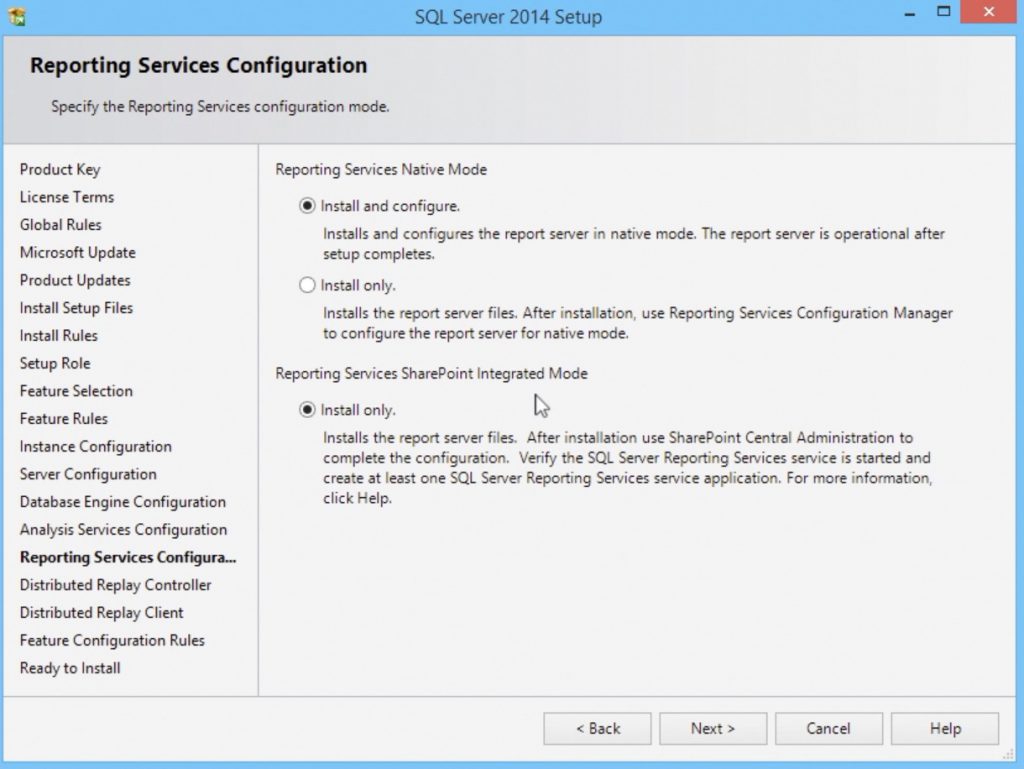
- In the reporting services configuration, you can select the Install Only option to just install the service now and later do the configuration to integrated with IIS. Or you can choose Install and configure option to do all the configurations now. For this article I’m choosing Install Only option and press next.
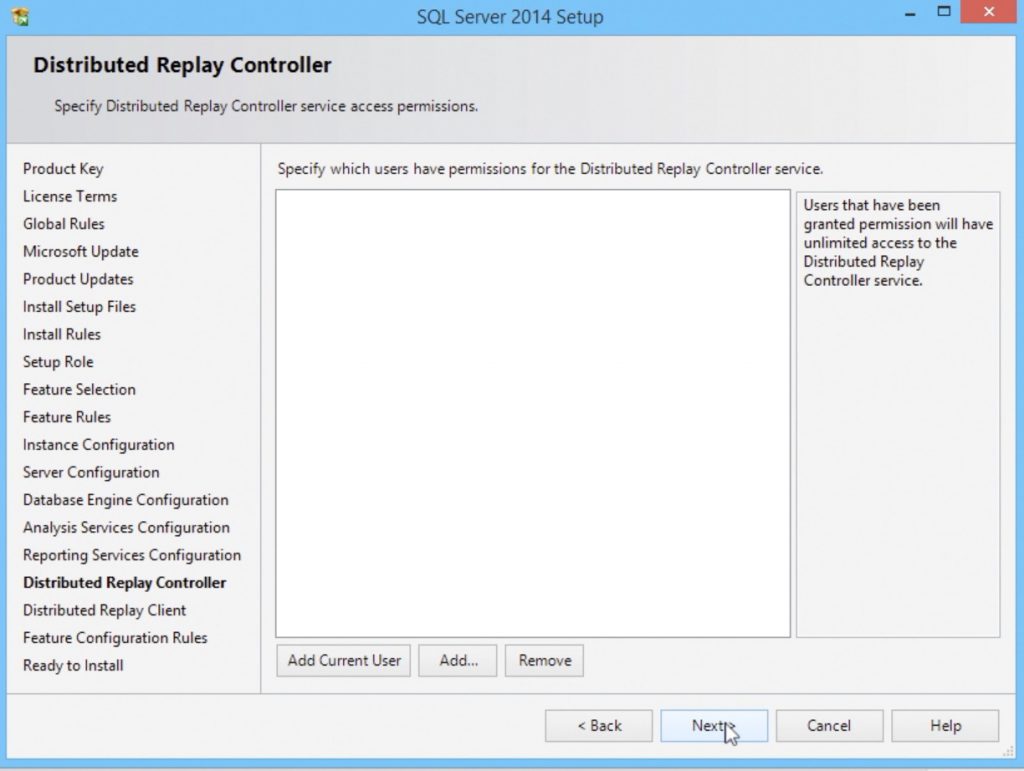
- In the distributor Replay Controller step, add a windows user for permissions and move on to next.
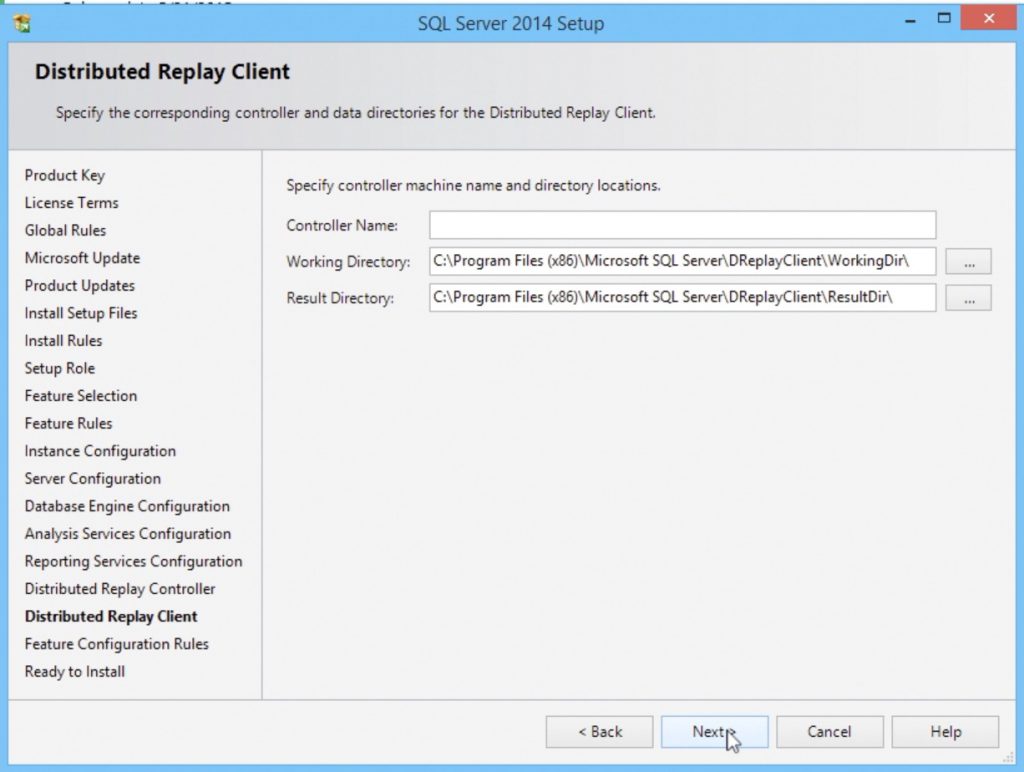
- You can leave the distributed replay client as it its and press next.
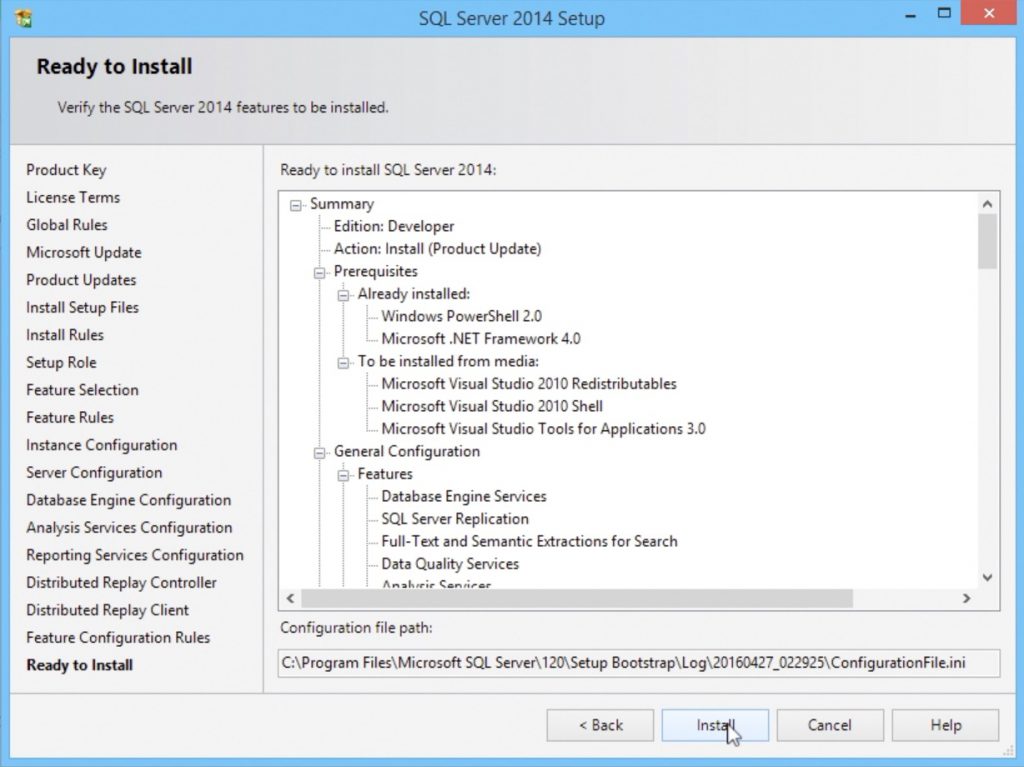
- The setup will now check the feature configuration rules and list down all the features so far we have selected. The setup is now ready to install. Press the Install button.
- The install process will go on for several minutes. Once complete, the setup screen will list down the status of installation of each feature. Now you can close the setup window.
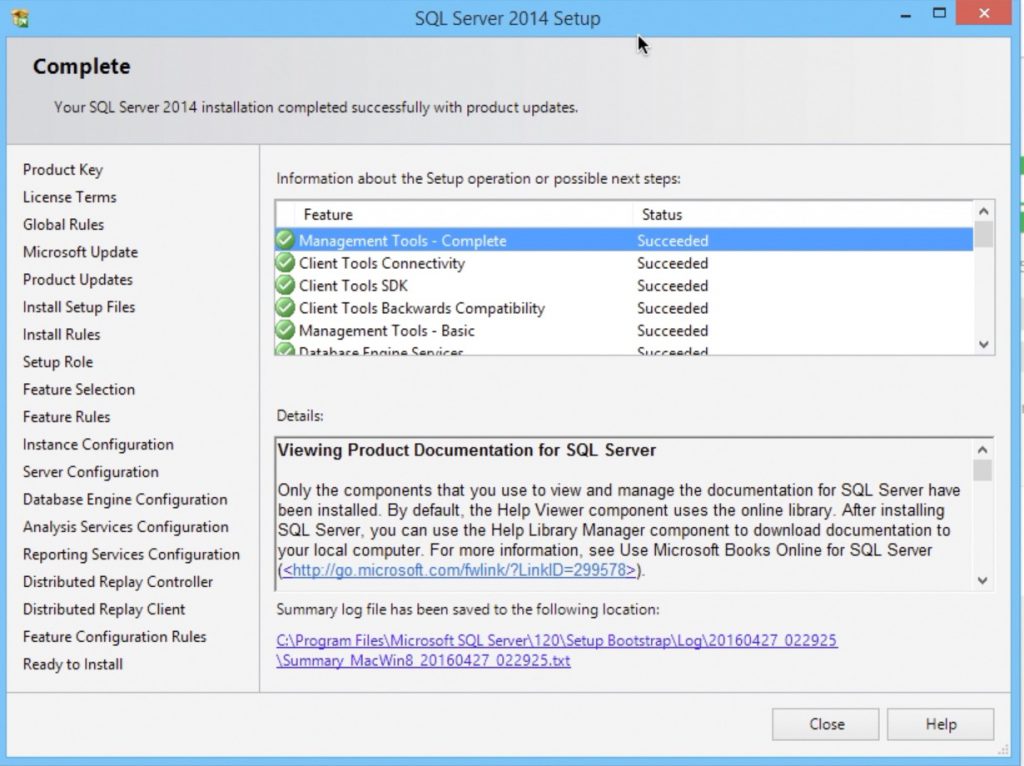
- The SQL Server 2014 Installation is now complete and the Developer Edition is ready to use.
Connecting To SQL Server 2014
- You can connect to the newly installed SQL Server through the SQL Server 2014 Management Studio.
- To launch management studio, Go to Start, and look for SQL Server Management Studio and press the icon.
- In the management studio login window, by default the current logged in windows credentials will be set. As we have opted for Mixed mode during installation, you can login to management studio either using windows credentials or using sql credentials (like the sa login).
- Once logged in. In the left panel under the instance name, you can see the installed system databases and system objects.
- We’ll see more about using SQL Server 2014 management studio in the next article.
Reference
- Installation of SQL Server 2014 @ Microsoft Developer Network