
Knockout.js is a Java Script library used for creating MVVM model. Using this model, you can segregate the user interface html from the rest of the code. This will be useful if your user interface changes often.
Twitter Bootstrap is a popular user interface framework. I’ve several other articles about using Bootstrap with ASP.NET. But, in this article, I’ve combined Knockout and Bootstrap with ASP.NET MVC with Razor view engine, to create a website with MVVM architecture.
This will be a simple sample website with a single table with two views. This step by step sample creation will be helpful, especially for the beginners who are trying to create their first application with Knockout, Bootstrap and MVC.
For convenience, I’ve split this article into two parts.
Part 1: In part 1 of this article, you will create solution with database and create the controller and the views using entity framework. Then you will implement bootstrap user interface framework.
Part 2: In part 2, you will implement the MVVM using Knockout.JS.
Let’s start our sample with Knockout.js and Bootstrap with ASP.NET MVC.
Tools and Technologies Used:
- Visual Studio Express 2012 for Web.
- SQL Server Compact 4.0 Local Database.
- ASP.NET MVC 4.
- Razor View Engine.
- Entity Framework 5.
- Knockout.js v2.2.0.
- JQuery v1.9.1.
- Bootstrap UI Framework v2.3.2 from NuGet.
- Bootstrap fluid layout from here.
Sample Source Code:
The sample source code generated from this article is available in GitHub.
Step By Step Instructions For Using Knockout.js and Bootstrap with ASP.NET MVC
I. Creating the Project and the Solution:
- Launch Visual Studio Express 2012 for Web or any edition of Visual Studio 2012.
- Go to File menu and select New Project…
- Create a new ASP.NET MVC 4 Web Application project.
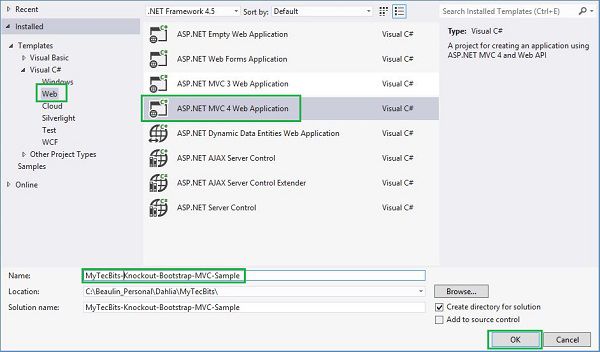
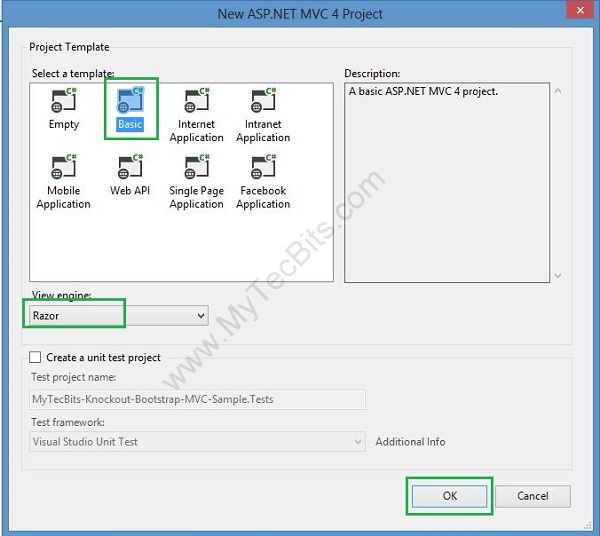
- Select Basic project template.
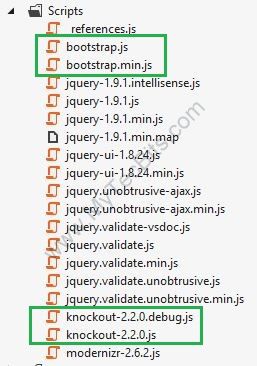
- Once the project and the solution are created, check the scripts folder under the project. You will see jQuery and Knockout js files already available. As we have selected basic template, several NuGet packages needed for a basic website is already added to the solution.
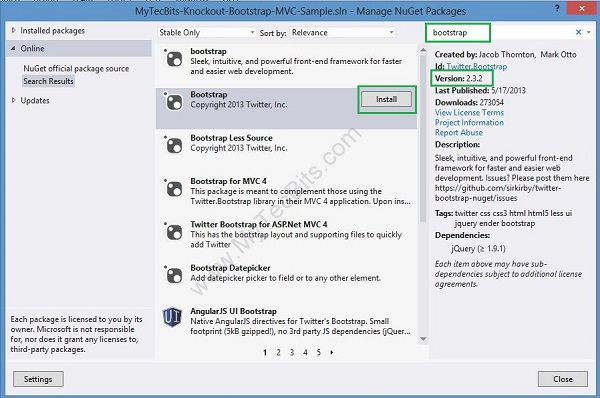
- Go to Solution Explorer –> right-click the solution and select Manage NuGet Packages.
- In the Manage NuGet Packages screen, select Online from the left panel, Then NuGet official Package source underneath and search for Bootstrap.
- From the search result list in the center panel, select Bootstrap (version 2.3.2 or higher).
- Click the Install button to install Bootstrap.
- Now the solution is ready to start the coding.
II. Creating local Database and the Table:
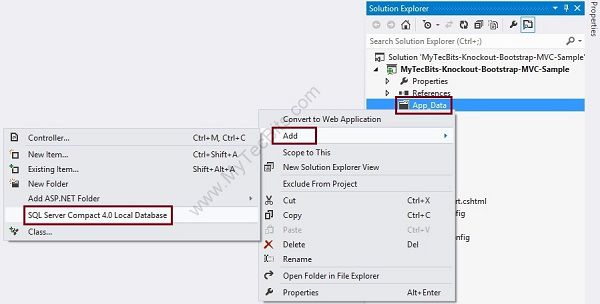
- In the solution explorer, right-click the folder App_Data and add an SQL Server Compact 4.0 Local Database.
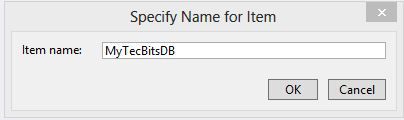
- Enter the name of the database in the pop-up screen.
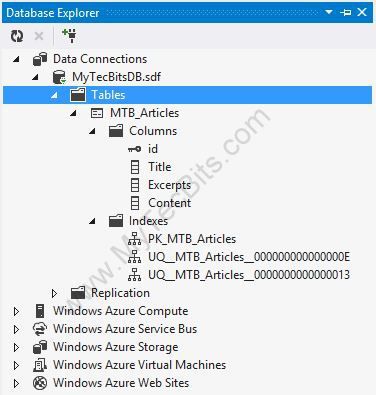
- Right click the newly created database and select Open to open the Database Explorer.
- In the database explorer right-click the folder and select Create Table.
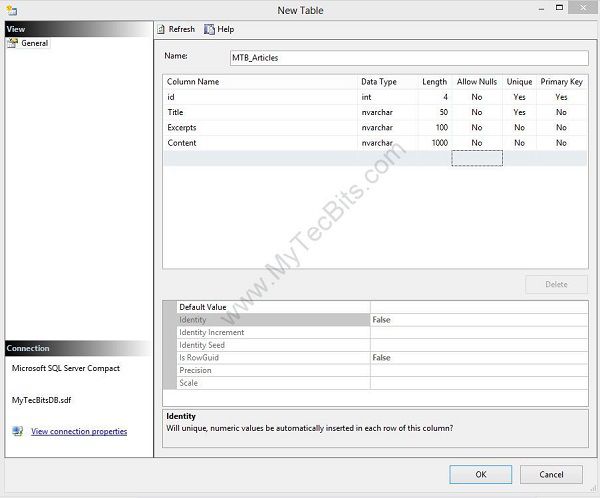
- In the New Table window, enter the table name and add the columns. Add the constraints needed. For this example, I’ve created a table called MTB_Articles. There are 4 columns. The primary key column id is an identity column. The remaining columns are nvarchar.
- Add the database connection details to the web.config file.

<add name="MyTecBitsDBContext" connectionString="Data Source=|DataDirectory|\MyTecBitsDB.sdf" providerName="System.Data.SqlServerCe.4.0"/>
III. Creating a Model:
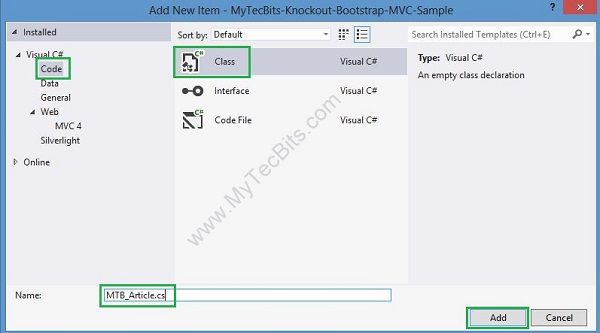
- In the solution explorer, right-click the Models folder; select Add and then New item….
- In the Add New Item screen select Class.
- Enter the Name of the class as MTB_Article.cs. Then click Add.
- In the newly created model file, replace the existing code with the below code.
using System; using System.Collections.Generic; using System.Linq; using System.Web; using System.Data.Entity; namespace MyTecBits_Knockout_Bootstrap_MVC_Sample.Models { public class MTB_Article { public int id { get; set; } public string Title { get; set; } public string Excerpts { get; set; } public string Content { get; set; } } public class MyTecBitsDBContext : DbContext { public DbSet<mtb_article> MyTecBitsDB { get; set; } } } - Rebuild the solution.
IV. Creating a Controller and the Views:
Now, we’ll create a controller for the model and the related view files using entity framework.
- In the solution explorer, right-click the Controllers folder.
- Select Add and then Controller….
- In the Add Controller scree, change the name of the controller to MTB_ArticlesController.
- In the Scaffolding options, select the template MVC controller with empty read/write actions and views, using Entity Framework.
- Select the model class MTB_Article.
- Select the data context class MyTecBitsDBContext.
- Leave the views as Razor.
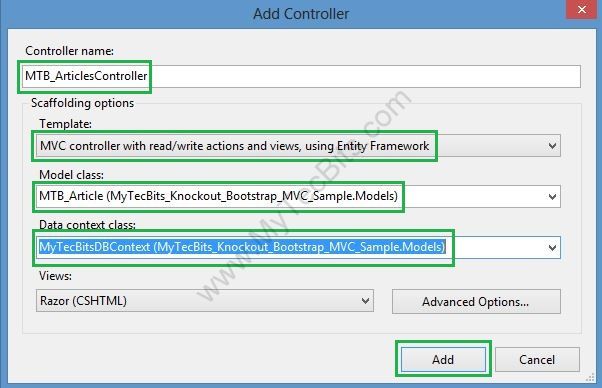
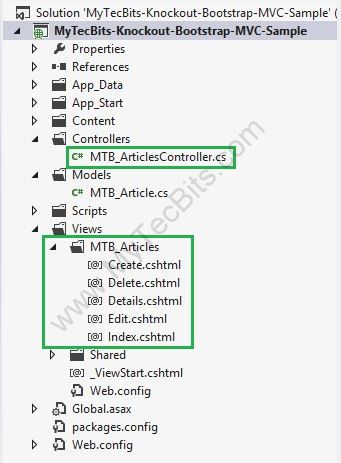
- Click Add. This will create a controller MTB_ArticlesController.cs and the five views (Create, Delete, Details, Edit and Index) for the model.
- In the solution explorer, right click the project and select Properties.
- In the properties screen, go to Web section and select Specific page.
- In the Specific page field enter the view folder name MTB_Articles. This will load the Index.cshtml view under the folder MTB_Articles.
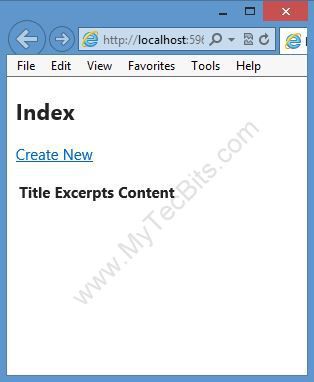
- Rebuild and load the solution. You will see the simple index view loaded. Now the project is ready to implement Bootstrap and Knockout.js.
Adding Bootstrap to the Layout:
- From the solution explorer open the file BundleConfig.cs under the folder App_Start.
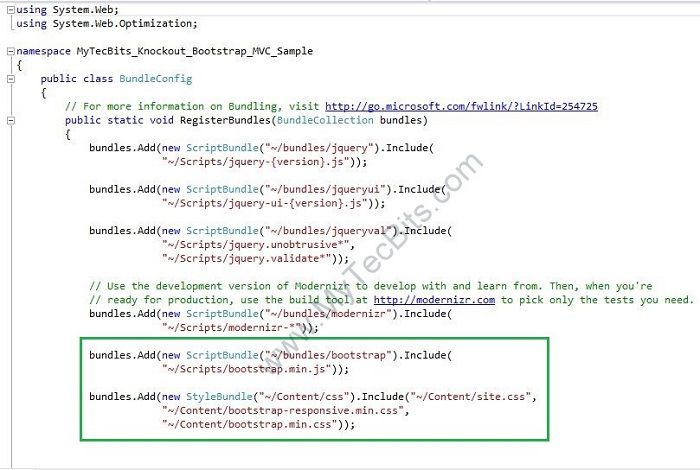
- BundleConfig.cs file add bootstrap style sheet file to the bundle list.
bundles.Add(new StyleBundle("~/Content/css").Include("~/Content/site.css", "~/Content/bootstrap-responsive.min.css", "~/Content/bootstrap.min.css")); - Add the bootstrap java script file to the bundle list.
bundles.Add(new ScriptBundle("~/bundles/bootstrap").Include( "~/Scripts/bootstrap.min.js")); - The modified BundleConfig.cs file looks like this.
- In the solution explorer, expand the Views folder and then the Shared folder. Open the layout file _Layout.cshtml.
- Replace the content of the file with the below.
<!--<span class="hiddenSpellError" pre=""-->DOCTYPE html><htmllang="en"><head><metacharset="utf-8"><title>@ViewBag.Title</title><metaname="viewport"content="width=device-width, initial-scale=1.0"><metaname="description"content="My <span class="/>Tec Bits - Articles"><metaname="author"content="My <span class="/>Tec Bits"><!-- Style Sheet Section -->@Styles.Render("~/Content/css")</head><body><divclass="navbar navbar-inverse navbar-fixed-top"><divclass="navbar-inner"><divclass="container-fluid"><buttontype="button"class="btn btn-navbar"data-toggle="collapse"data-target=".nav-collapse"><spanclass="icon-bar"></span><spanclass="icon-bar"></span><spanclass="icon-bar"></span></button><aclass="brand"href="#">My Tec Bits</a><divclass="nav-collapse collapse"><pclass="navbar-text pull-right">Logged in as <ahref="#"class="navbar-link">Username</a></p><ulclass="nav"><liclass="active"><ahref="@Url.Action("", "MTB_Articles")">Home</a></li><li><ahref="#about">About</a></li><li><ahref="#contact">Contact</a></li><!--<span class="hiddenSpellError" pre=""-->ul></div><!--/.nav-collapse --></div></div></div><divclass="container-fluid"><divclass="row-fluid"><divclass="span3"><divclass="well sidebar-nav"><ulclass="nav nav-list"><liclass="nav-header">Articles</li><li><ahref="@Url.Action("", "MTB_Articles")">Home</a></li><li><ahref="@Url.Action("Create", "MTB_Articles")">Add</a></li><liclass="nav-header">Categories</li><li><ahref="#">Category 1</a></li><li><ahref="#">Category 2</a></li><li><ahref="#">Category 3</a></li></ul></div><!--/.well --></div><!--/span--><divclass="span9"><divclass="row-fluid"><br/>@RenderBody()</div></div><!--/span--></div><!--/row--><hr><footer><p>© MyTecBits.com 2013</p></footer></div><!--/.fluid-container--><!-- <span class="hiddenSpellError" pre="">javascript</span> Section -->@Scripts.Render("~/bundles/jquery")@Scripts.Render("~/bundles/bootstrap")@RenderSection("scripts", required: false)</body></html> - Expand the Content folder in the solution explorer. Open the style sheet file style.css. Add the below code.
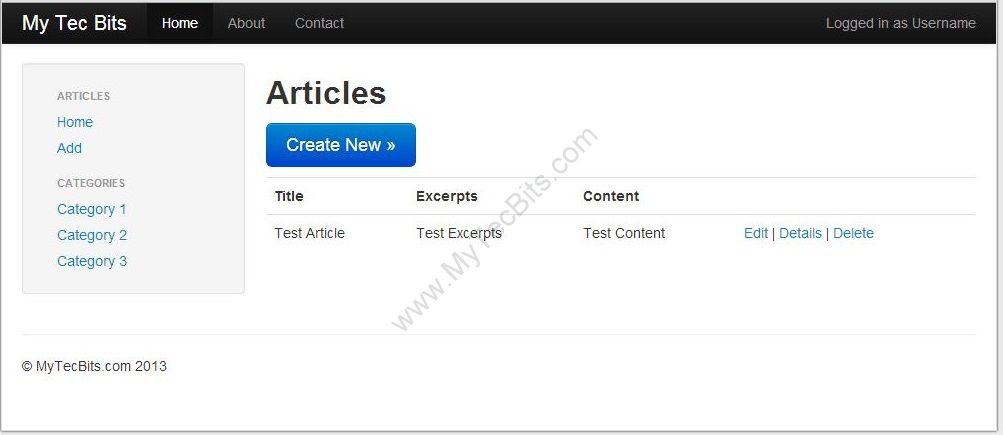
body { padding-top: 60px; padding-bottom: 40px; } .sidebar-nav { padding: 9px 0; } @media (max-width: 980px) { /* Enable use of floated navbar text */ .navbar-text.pull-right { float: none; padding-left: 5px; padding-right: 5px; } } - Rebuild the project and run. You can see the webpage looks like this.
Now the solution is ready to implement Knockout.JS. We will work on the Knockout.js in Part 2.
Go to Part 2 (Implementing KnockoutJS) >>
In Creating a Model step 4 in your second class (MyTecBitsDBContext), the DbSet calls “mtb_article”, but there is no such class. I believe you meant to have the DbSet call “MTB_Article” in the different case sensitive format —> DbSet
This is an article that I would really like to get working. Any chance of updating it to VS2013? Too much seems to have changed in the newer release.
Yeah it totally breaks up in VS 2013. Request the author to update this blog. Than ks in advance!!.
Good article for beginners, yet to start with second part.
I was playing with bundling since my bootstrap files were not loading properly, my problem was I was adding min files in bundling and not normal debug version of file. and bundling bydefault only includes normal files in debug mode and in release mode it searches for min version and if exists includes that in page
Thanks to khellang
https://stackoverflow.com/questions/14965301/asp-net-mvc-style-bundle-not-including-most-files/14967754#14967754
Thank you,
Sandesh Daddi
http://www.sanshark.com
Twinkle,
It worked for my with ie8. I would be nice if you could bring back the edit, details and delete features that got deleted in part2. I am having some difficulties to get them to work
It us a nice and helpful example nevertheless.
Dear Twinkle,
I have tried to follow all the steps in your article but i am unable to get the desired result.
In your source code on the following link
https://github.com/mytecbits/Knockout-Bootstrap-MVC-Sample/blob/master/MyTecBits-Knockout-Bootstrap-MVC-Sample/Web.config
I have identified a few difference .
your code has a Scripts/ViewModel/IndexVM.js file
but there is no such file in my code.
Also my Views/MTB_Articles/ index.cshtml is very different to the one in your source code.
If you would like I can post the both files.
I hope you ‘ll help me to figure out what’s going wrong and what i am doing wrong.
Thanks in advance
Zia
Hello Zia Ul Hassan,
This article has 2 parts. The IndexVM.js file and the additional changes in index.cshtml are done in the Part-2 of this article. Please refer (http://www.mytecbits.com/microsoft/dot-net/knockout-js-and-bootstrap-with-asp-net-mvc-part-2) for part-2.
Really wonderful article. Everything has been perfectly put together. It looks like we will get such UI only with browser higher than IE8. Can you explain what changes are required to get this look and feel with IE8
Hello Nirmit,
I haven’t got a chance to test this ui in IE version 8 or lower. According to Knockout JS documentation (http://knockoutjs.com/documentation/browser-support.html) it will support IE 6 and higher.
According to Bootstrap documentation (http://bootstrapdocs.com/v1.1.0/docs/#about), version 1.1 of bootstrap was tested with IE7+. The Bootstrap documents for Version 2.3 and higher doesn’t say anything about browser support. I tried to load the this sample in IE 10 and changed the browser and document compatibility mode to IE 7 and IE8. In IE 8 and lower, the rounded edges were missing. So I believe Bootstrap 2.3 or higher will support IE9 or higher.
If I find any workaround to get the similar rounded edge buttons in IE8 or lower using bootstrap, I’ll update this article.