
I assume, you have already set up the DNN module development environment. If you haven’t done it yet, then please go to this article to do it.
To make the dnn module development little easier, Chris Hammond at DNN Corp., has created a visual studio project template. This project template will have all the references and the basic skeleton needed for the dnn module development.
Tools and Technologies Used:
- DNN 7.2.2
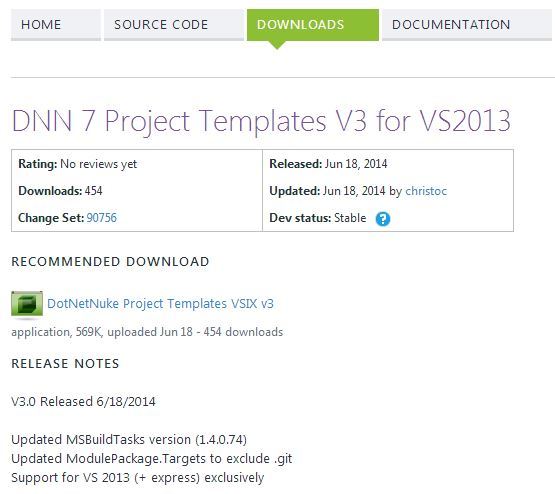
- DotNetNuke Project Template version 3.0
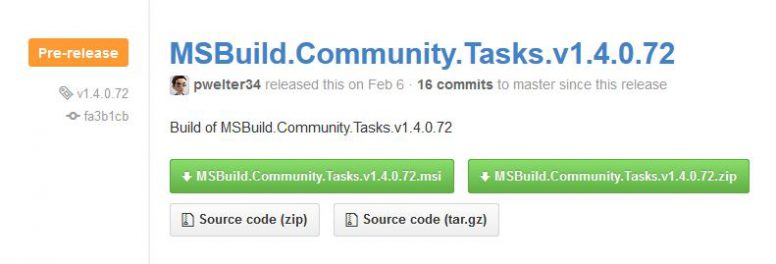
- MS Build Community Task version 1.4
- Visual Studio Express 2013 for Web
Installing DNN Visual Studio Project Template:
- Download and install the dnn 7 visual studio project template from http://christoctemplate.codeplex.com/releases. On this time of writing this article, the version of the template is V3 for VS2013. I’ve downloaded the recommended DotNetNuke Project Templates VSIX v3. This vsix package has both the vb.net and c# template.
- Double click the downloaded file DNNTemplates.vsix to install the template.

- This template depends on MS Build Module for packaging and has some MS Build Scripts. We need to install MS Build module before utilizing the templates. We can download the MS Build task from https://github.com/loresoft/msbuildtasks/releases.
- Go to Github MS Build Tasks project and download the latest version of MS Build and install it.
- Now you are ready to use the DNN 7 Module Development Template.
Creating the Module Development Project:
- Launch Visual Studio 2013 or Express 2013 for web.
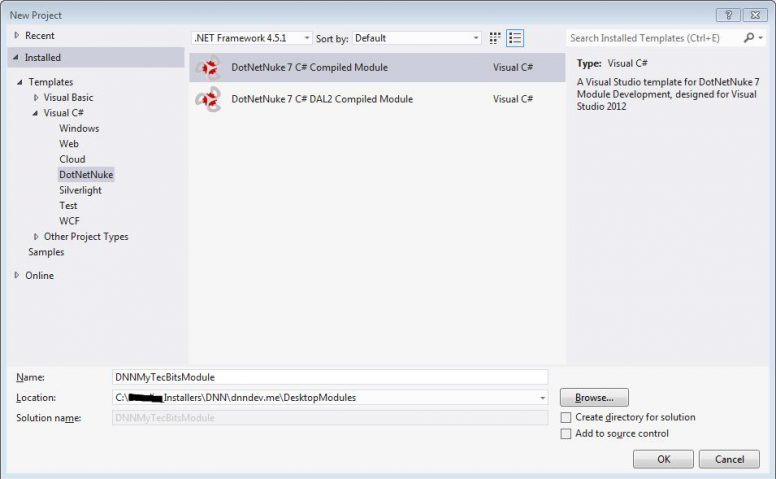
- Go to File menu and open the New Project window.
- Choose either VB or C#. I choose C#.
- Under C# select DotNetNuke, and then DotNetNuke 7 C# Compiled Module.
- Enter the name to the project.
- In the location field enter the location of the DesktopModules folder in the dnndev.me website, which we have created in the dnn module development environment setup. It is good to set the location to DesktopModules folder, because the template is designed to work better from this location.
- Un-check the “Create directory for the solution” option and click OK to create the project.
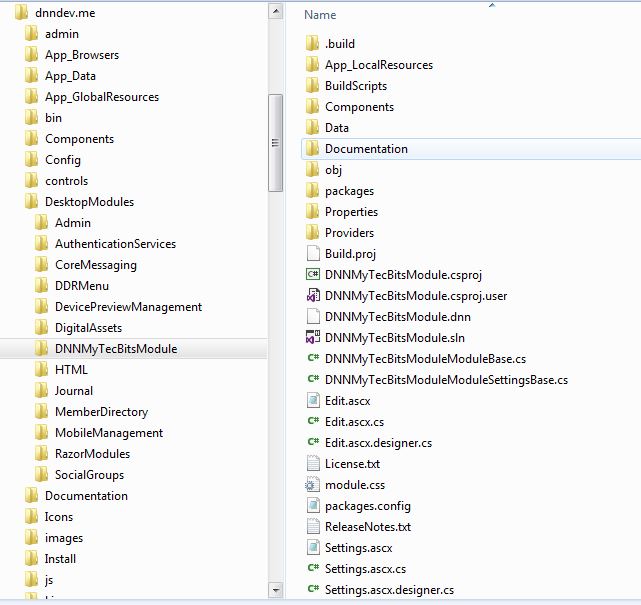
- The new project will be created under DesktopModules folder.
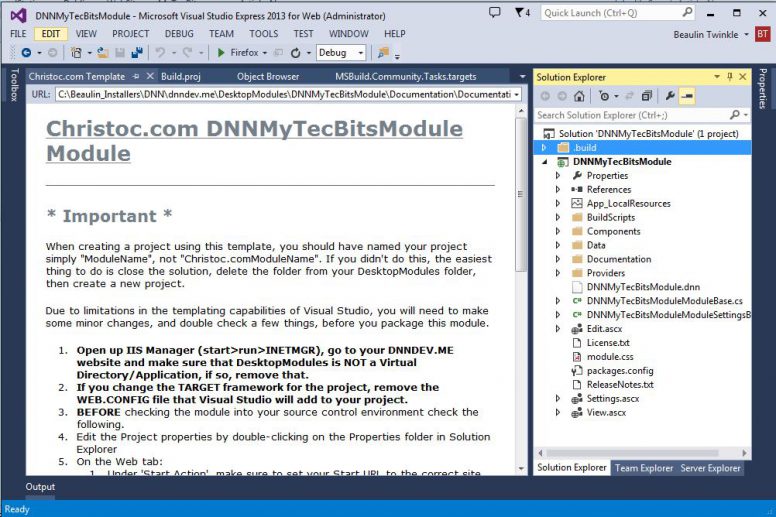
- In the visual studio solution explorer, by default a html document (documentation.html) file will be opened. This file will have instructions of some more configurations to be done for the project solution before starting the coding. As as on project template version 3.0, below are the additional configurations listed in the document. I’ve added them below for your reference.
Configuring the Module Development Project:
- Go to IIS Manager (start>run>INETMGR), go to your dnn website (dnndev.me) and check the DesktopModules folder. Make sure that DesktopModules is NOT a Virtual Directory or Application, if so, remove that.
- In case if you have changed the Target Framework while creating the project, then remove the Web.Config file that Visual Studio will add to the project.
- Before checking the module into any source control environment, check the settings in project properties as follows.
- Edit the Project properties by double-clicking on the Properties folder in Solution Explorer.
- On the Web tab:
- Under the ‘Start Action‘ section, check and make sure to set the Start URL to the correct web site (ex: .
- Under the ‘Servers‘ section, check and make sure to “Use IIS Web Server” with a project url of ; and an Override application root URL of .
- Save the project and solution.
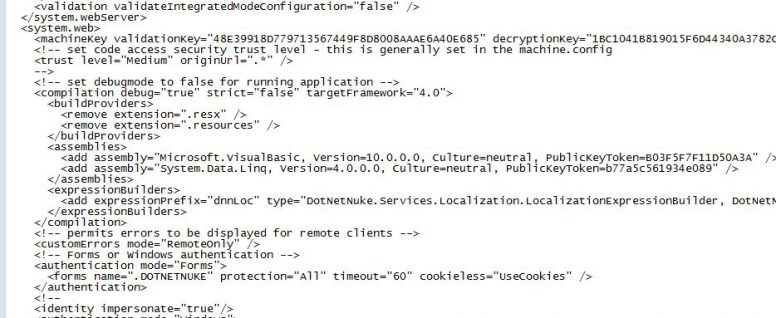
- Open the web.config file in the dnndev.me (..\dnndev.me\web.config) and enable the debug mode by changing the value of debug from false to true. If you miss this step, you may get an error (“Unable to Start Debugging on the Web Server“) when building the project in debug mode.
- Now the project is ready for the module development.
Building and installing the project source:
- Go to Solution configuration settings and change the build type to Release.
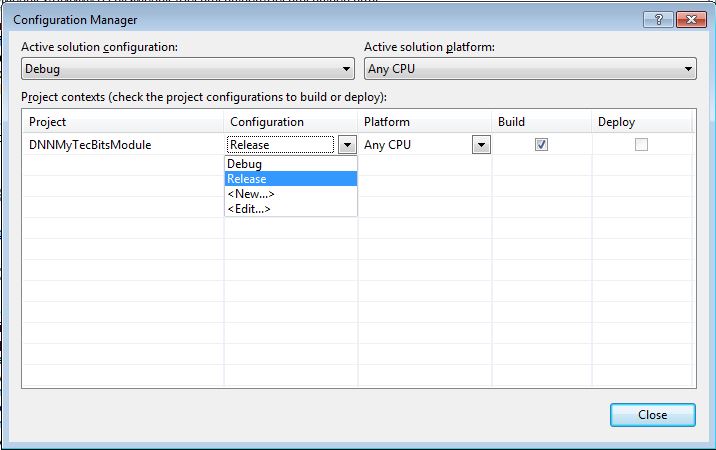
- Build the solution.
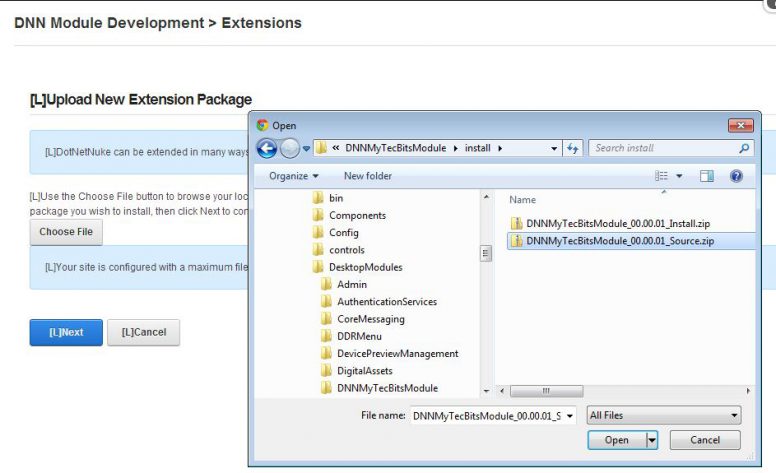
- Once the build is completed successfully, open windows explorer, go to the folder “dnndev.me\DesktopModules\DNNMyTecBitsModule\install“. under “install” folder you can see two zip files. one ends with “Install” and another ends with “source“.

- Close the visual studio and log-in to the dnndev.me website.
- login to the website using the host login.
- Go to Host >> Extensions page.
- Launch the “Install Extensions Wizard“
- In the Install Extensions Wizard, select the Source zip file (example, in my case the file name is “DNNMyTecBitsModule_00.00.01_Source.zip“).
- Click Next and complete the installation process.
- Once installed successfully, you can see the new module in the Extensions list.
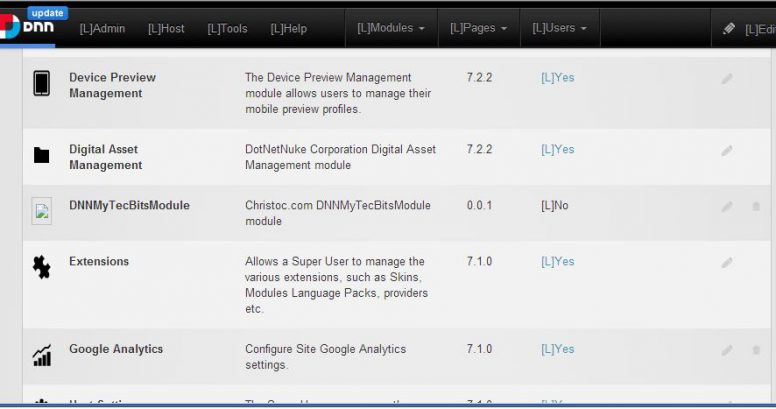
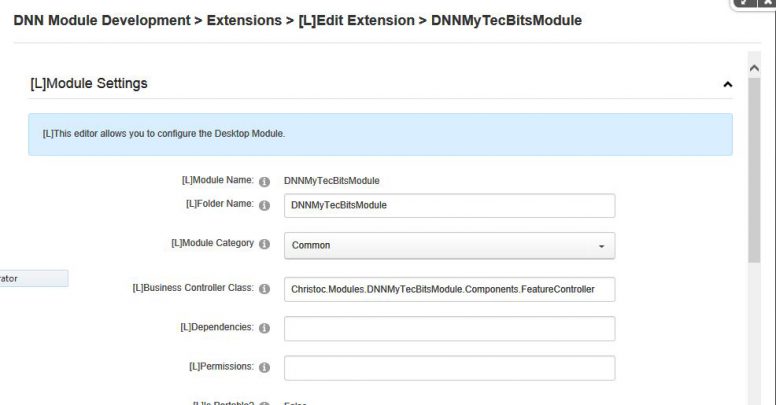
- For convenience, you can edit the module in the extensions list and change the Module Category to Common.
Test Page for the Module:
Once the module source is installed, We have to create a test page and add the module to the test page. At this state, the module will not have anything. Still adding the blank module to a page in the website, will help us to debug during the development process.
- Add a new page to the portal with View Page permission to All Users.
- Add the module to the page.
- Now if you open the visual studio project and build it, the portal dnndev.me will launch.
- You can navigate to the page with the module and debug the module.
Everything is ready to start your module development, debugging and testing.
Related Articles
Reference
- Chris Hammond’s DNN Visual Studio Project Template at http://christoctemplate.codeplex.com/releases/view/616568