

In my earlier article, I’ve explained how to install SQL Server Developer Edition. In this article, I’ll walk you through Microsoft SQL Server Management Studio (SSMS) and how to connect to SQL Server Instance using management studio.
I’ve divided the management studio section into 2 parts. This is part 1. I’ll write the part 2 in the next article.
Contents of SQL Server Management Studio Part-1
- In this first part, we will see about SSMS.
- How to login to SQL Server Management Studio.
- How to connect to SQL Server.
- About Object explorer window and how to use it.
- About Object explorer details window.
- About Properties window.
Video Walk Through On SQL Server Management Studio – Part-1
What is SSMS?
- SSMS is the short form of SQL Server Management Studio.
- Management studio is not a database. It’s just a client application or an user interface to connect to SQL Server installed in local pc or in a network on a server.
- Using SSMS we can configure, manage and administer the SQL Server components like Database, Reporting Services, Analysis Services, SQL Server agent, etc.
- SSMS connecting SQL Server:
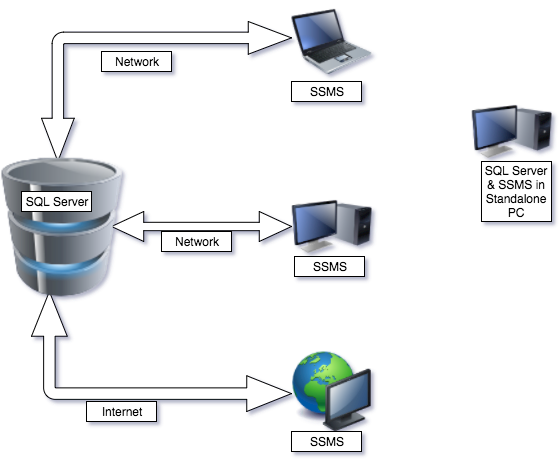
- This is a diagrammatic representation of how the SSMS can connect to the SQL Server.
- In the right side of the diagram, there is a personal computer. In the computer both the SQL Server and SSMS are installed together. The SSMS in the PC can connect to the PC’s Local SQL Server. This is a straight forward way.
- This will not be the case in a big company or an organization or in a production environment.
- In companies, SQL Server is normally installed on a data server. The data server can be connected through the network.
- For example, in the left side of the diagram, the laptop and the workstations are connected to the SQL Server in the network. The laptop and workstation have SSMS installed in them.
- The developer can launch the SSMS from the laptop and connect to the SQL Server instance using the server’s IP or name.
- Management studio can also connect to SQL Server through the internet, provided the server has a static IP or registered domain name.
Starting SSMS
- To launch SSMS: I’m using Windows 10. In windows-10 first you have to go to start icon and then to All Apps.
- In all apps, scroll down and find Microsoft SQL Server 2014 folder.
- Under Microsoft SQL Server 2014 folder look for SQL Server 2014 Management Studio and click.
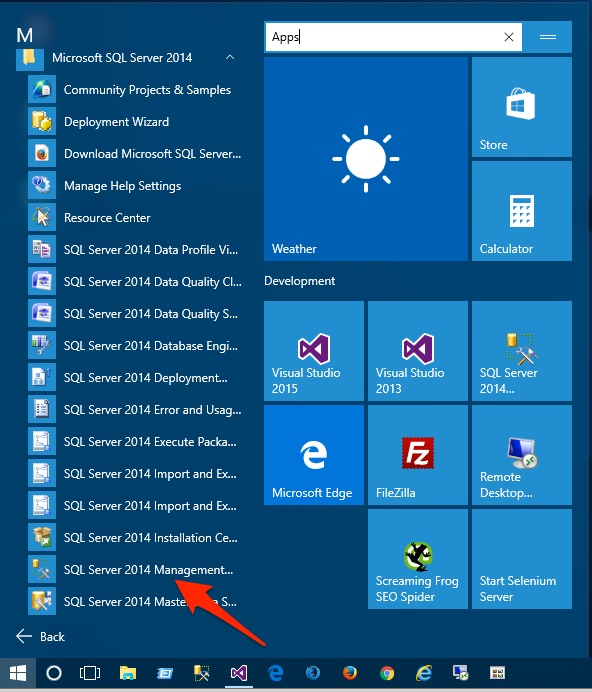
- The login screen of management screen will appear.
Connecting SQL Server
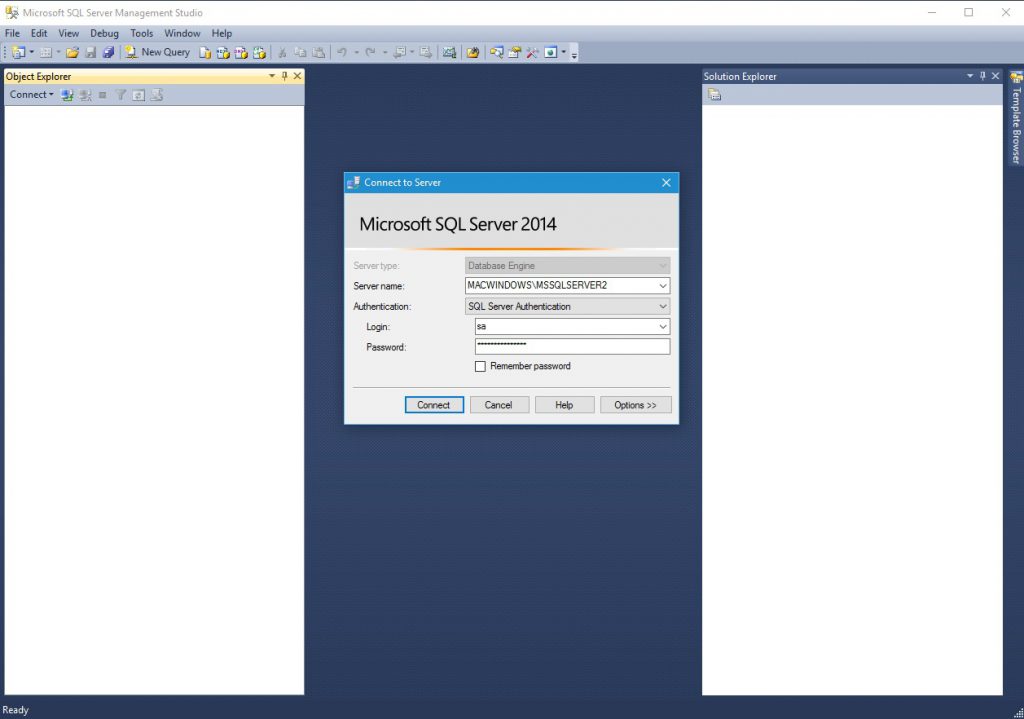
In the login screen there are several fields to configure the SQL Server connection details. Let’s see about the fields one by one.
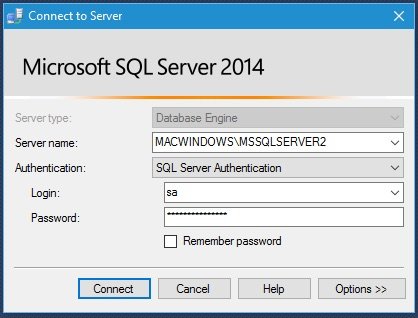
Server Type
The first field in the login window is the server type. There are four server types:
- The Database Engine, which has the database and other database components.
- Analysis Services, which is used in decision support and business analysis.
- Reporting Services, which is used for generating user-friendly reports.
- Integration Services, which is used for building enterprise-level data integration and data transformations solutions.
As we are dealing with the database now, select the server type as Database Engine in Server Type Field.
Server Name
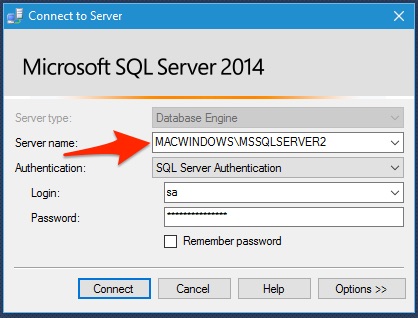
The second field is the Server Name. In the server field we have to enter the name or the IP address of the server where SQL Server database engine is installed. If there is a named instance then we have to specify the instance name after the slash.
An SQL Server Instance is a complete SQL server. You can install more than one instances, I mean more than one SQL Server on a machine or pc. Only one of them will be the default instance with just the name of the server or PC. The other instances are called as named instances. The named instances needs to be specified with the instance name along with the server or computer’s name.
Here MACWINDOWS is the server name and MSSQLSERVER2 is the instance name.
In case if the SQL Server is in the same machine along with the SSMS then you can just enter “.” to connect to the default local instance of the SQL server. Another option is to enter “local” in opening and closing brackets.
Even though my SQL server is installed in the same PC as the SSMS, I’m entering the PC’s name followed by a slash and the instance name. This is because, I have more than one instance of SQL Server in my PC.
Authentication
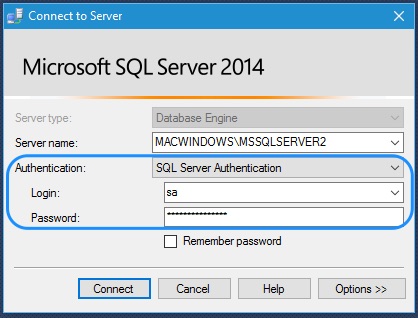
The next field is the authentication type. There are 2 types of authentication, the windows authentication and the SQL Server authentication.
- If you select windows authentication, then the login process will use the current logged in windows user credentials.
- If you select SQL Server authentication, then you have to enter the SQL server login password. If this is a fresh installation of SQL server, then login with the user name “sa” and password you have provided during the SQL Server installation.
Remember Password
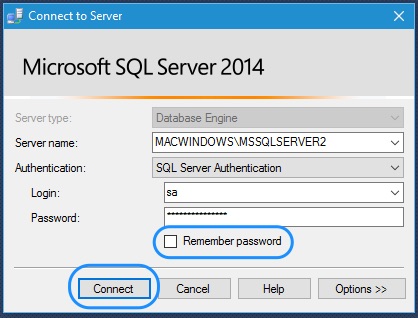
The last and the optional field is Remember password. If you have to frequently use SSMS in your secured PC or workstation, then use the remember password option.
Finally press the Connect button to connect to the SQL Server Database Engine. Now you will be logged in to the SQL Server Management Studio.
SQL Server Management Studio Components
The SQL Server Management Studio’s User Interface is divided into 2 major panels. The object explorer window and the document window.
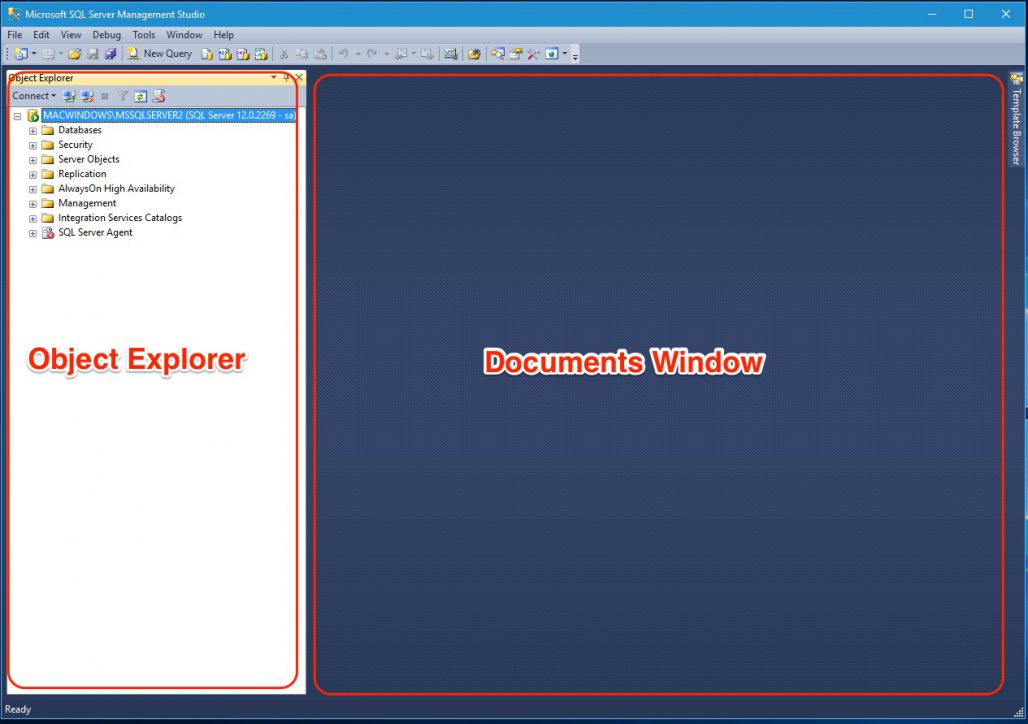
Object Explorer Window
- The panel you are seeing in the left side is the Object Explorer.
- Object Explorer lists down all the connected servers, their databases and other database objects and SQL Server Agent in tree structure.
- The objects other than database you can see in this window are security and logins, roles and credentials, etc.
- In the management section, you can see the database management objects like the maintenance plan, backup manager, SQL Server logs, etc.
- In SQL Server agent section, you can see the SQL jobs, alerts and error logs.
- After logging in to SSMS, if you want to connect to another server:
- Press the connect icon at the top of the Object explorer window.
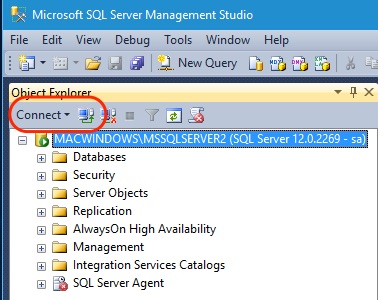
- The SSMS login window will pop-up.
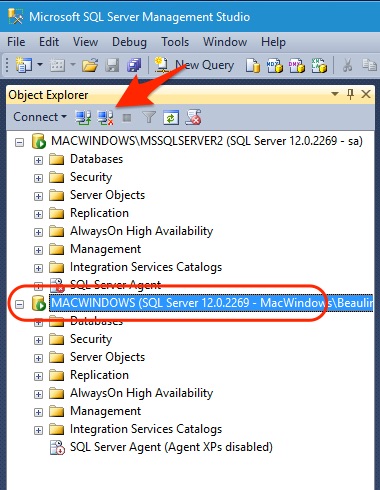
- In the login window, type in the other SQL Server name, enter the authentication details and press Connect.
- Now the SQL server will be connected and added to the tree view in the object explorer.
- If you want to remove the SQL server from the object explorer tree view, Select the SQL server you want to remove and press the disconnect icon, the disconnect icon is next to the connect icon. On disconnecting, the SQL server will disappear from the tree view.
- Press the connect icon at the top of the Object explorer window.
Document Window
The documents window panel is the most important part of the Management Studio, it shows the Object explorer details window, SQL query editor window, browser window, etc..
Object Explorer Details Window
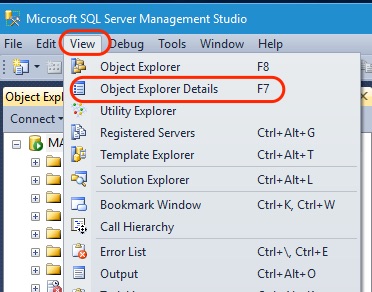
The object explorer details window, as the name suggests, will show the details of the object you select in the Object explorer.
- To open object explorer detail window, go to the View menu and select Object Explorer Details.
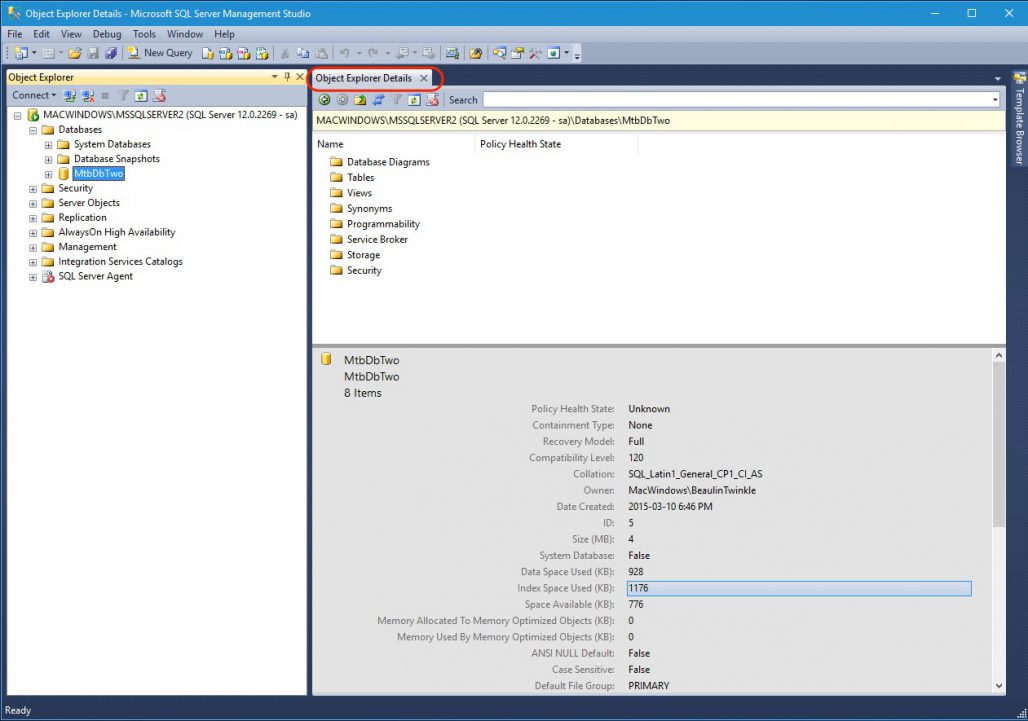
- The details widow will open in the panel right to the object explorer.
- This window will show the details of the object you are selecting in the Object explorer.
- Most of the details displayed in the details window is also available in the properties pop-up screen.
Properties Window
- To launch the properties screen, select an object, right-click. From the right-click menu select properties.
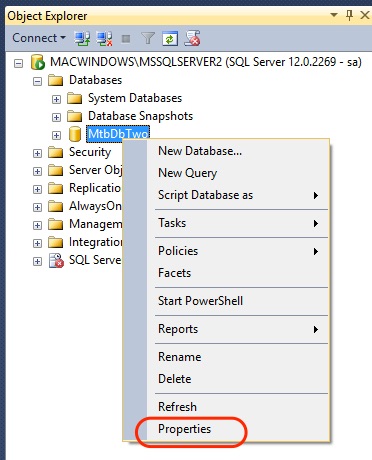
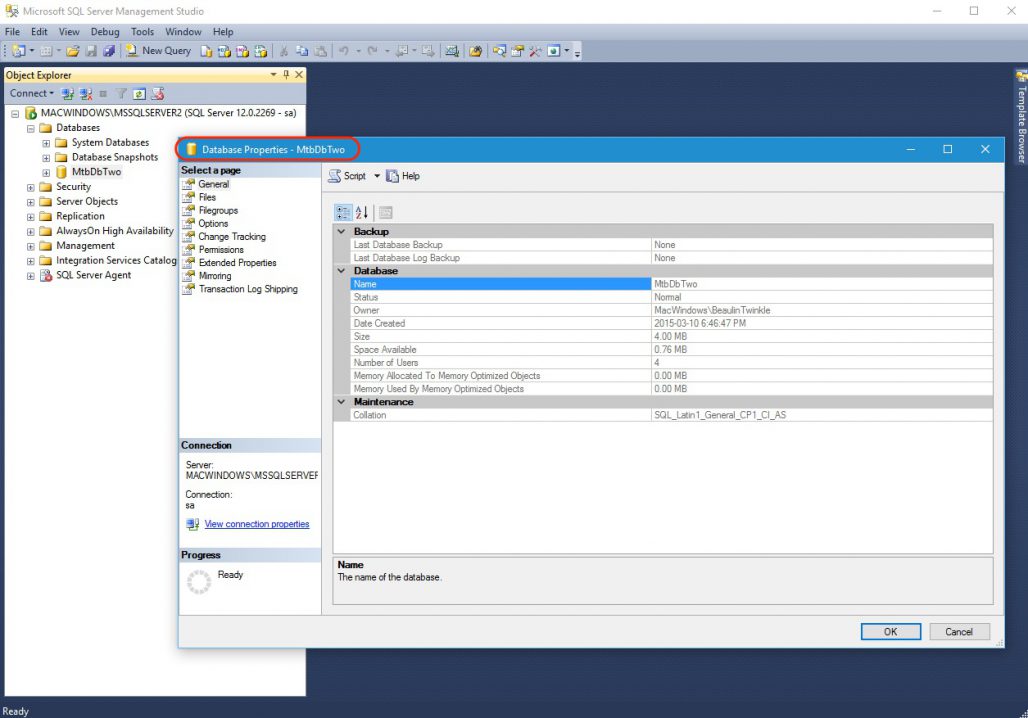
- This pop-up window show the detailed properties of the selected object.
Conclusion Of Part-1
With this I’m completing the part 1 of the SQL Server Management Studio Session. In the next session we will have the Part-2 of SQL Server Management Studio.
Contents of SQL Server Management Studio Part-2
- SQL Query editor Window.
- Changing Windows Layout.
- Some editing tools.
- Registered Servers.
- And about templates, solutions and scripting projects.
Go to Part-2 of SQL Server Management Studio Tutorial.
Reference
- SQL Server Management Studio in Microsoft Docs.